For 2021, one of my goals is to take online courses that continue what I learned last year. Since JavaScript was one of the major subjects learned in last year's Flatiron School experience, I decided to learn a brand new library and take a new course about creative coding!

When Stars Collide: Art and Tech Together
When I was in middle and high school, prior to wanting to work in tech, I studied the arts. Vocal music, specifically. But I like to express myself in other art forms, like drawing and writing.
For this year, I wanted to come up with ways to code in a more creative and expressive way as opposed to the usual functional or object-oriented way. I recently started learning to use the p5.js JavaScript library to create compelling sketches with code. Per their official website , "p5.js has a full set of drawing functionality" that treats the whole browser as a sketch canvas.
What is a Sketch?
A "sketch" is a term borrowed from the methodologies of the [Processing language] (processing.org) , which is a direct influence of p5.js. Sketching is the practice of visualizing an idea expressively with code.
The Wall Drawings of Sol LeWitt
One of my first homework assignments for the course was to practice sketching by drawing out these wall drawings by an American artist named Sol LeWitt . Considered the pioneer of Conceptual and Minimal Art, LeWitt was famously known for his wall drawings. The whimsical element of his drawings was that they weren't actual drawings! There were simple text cards with "instructions" for how to envision a given wall drawing.
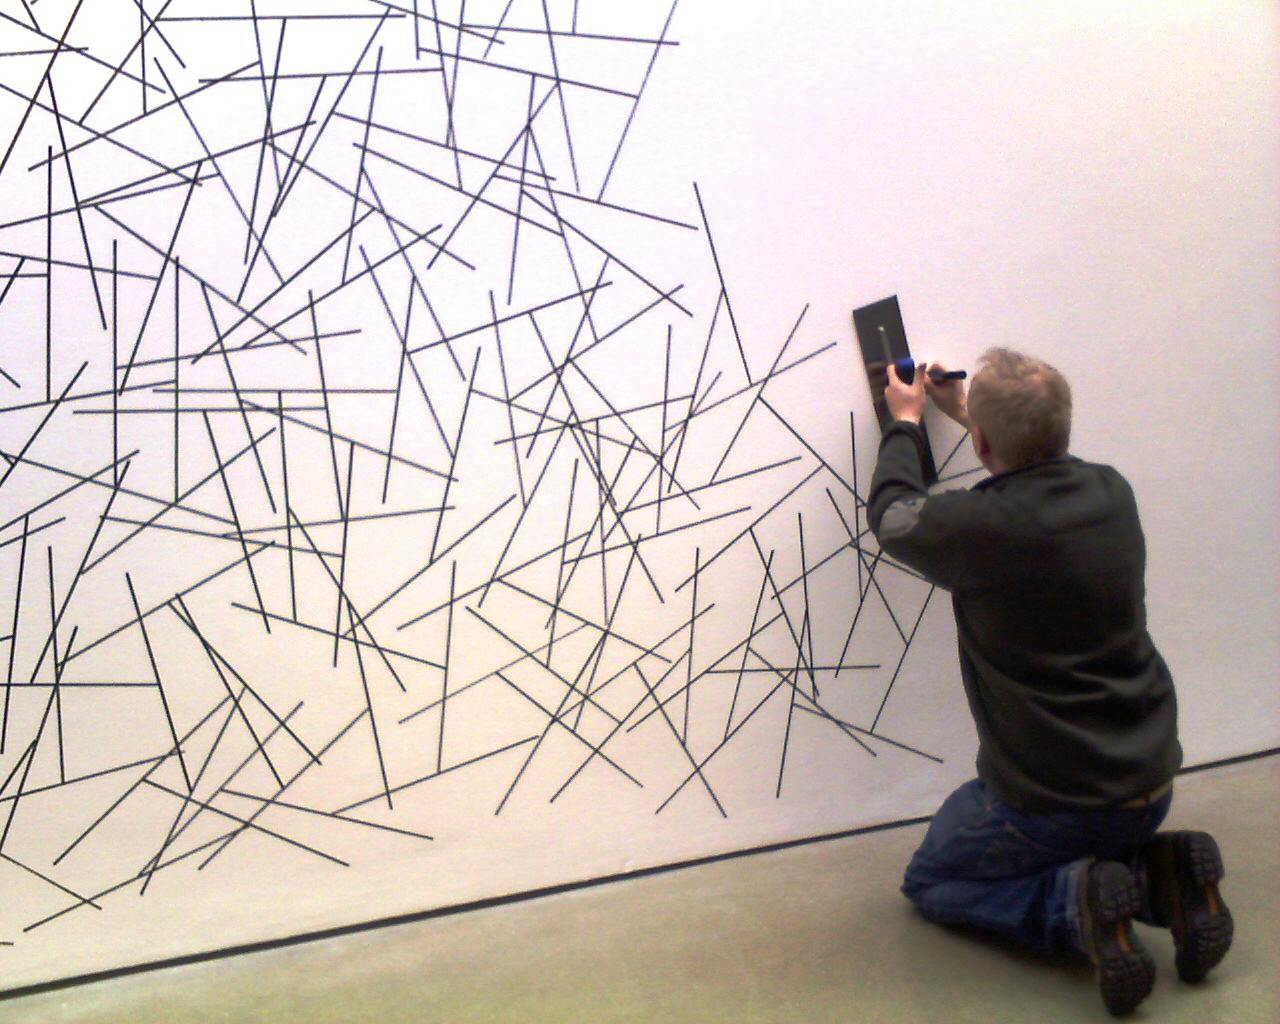
These instructions were usually composed of 1 or 2 sentences. The idea is that the observer reproduces the work by strictly following Sol's instructions. However, the observer is free to interpret anything else that wasn't explicitly mentioned in the instructions.
This seems like an ideal first exercise for someone like me who is just beginning to learn to draw with code.
Sol's Wall Drawings Using p5.js
Let's use the power of p5.js to draw Sol's "Wall Drawing #17" with code! Here is the image along with the instructions:
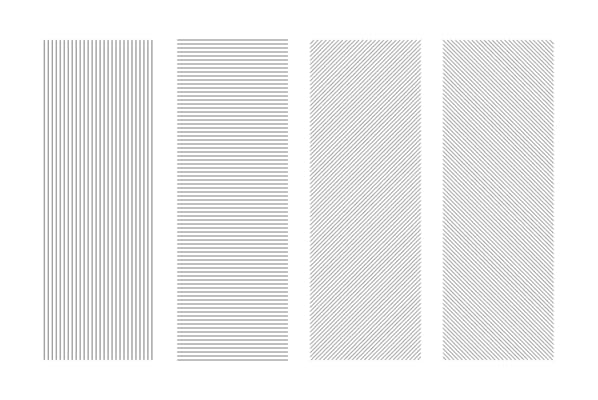
Four-part drawing with a different line direction in each part.
OpenProcessing
If you've never "sketched" or used a library like p5.js before, a great place to start practicing is at OpenProcessing , a fantastic online editor for creative coding. It's free to create an account and you can start sketching right away. You could also use p5.js's in-house editor, but this tutorial will be done from OpenProcessing.
Start a New Sketch
Click "Create Sketch" in the top right-hand corner. A new editor will appear with these two crucial pieces of code:
function setup() {
    createCanvas(windowWidth, windowHeight);
    background(100);
}

function draw() {
    ellipse(mouseX, mouseY, 20, 20);
}
The first function, setup(), does exactly what it says: it sets up the canvas on which we will draw our sketch. Inside, we set the dimensions of the canvas with createCanvas(), stretching it to the size of the browser window.
The other function, draw(), executes whatever p5-code is inside and "draws" on the web page "canvas" that was set up earlier.
For the rest of the tutorial, we'll work to refactor both of these functions so we can produce our Sol drawing.
Parse the Instructions
In order to render the desired drawing, we'll need to parse Sol's instructions and turn them into pseudocode. Let's revisit those instructions:
Four-part drawing with a different line direction in each part.
We can think of the "parts" as the sections of the canvas that get a different line direction:
- First part - lines are up and down
- Second part - lines are left to right
- Third part - lines are left-diagonal
- Fourth part - lines are right-diagonal
Notice, also, how, in the final image, it is wider than it is tall. This tells us that when we set up the canvas, its dimensions should reflect that. Let's go with 1000x500:
function setup() {
    createCanvas(1000, 500);
}
Now that our canvas is properly sized, it's time to move to next step.
The line() function
The drawing that we are trying to replicate is made up of just lines. In p5.js, there is a special set of functions dedicated to drawing 2-D shapes, including lines!
The line() function draws a physical line on the page when passed the arguments x1, y1, x2, and y2 --> line(x1,y1,x2,y2). In the example below, we use the function to evenly bisect the canvas.
function setup() {
  createCanvas(400, 400);
}

function draw() {
  background(255, 204, 0);
  line(0,0,400,400)
}
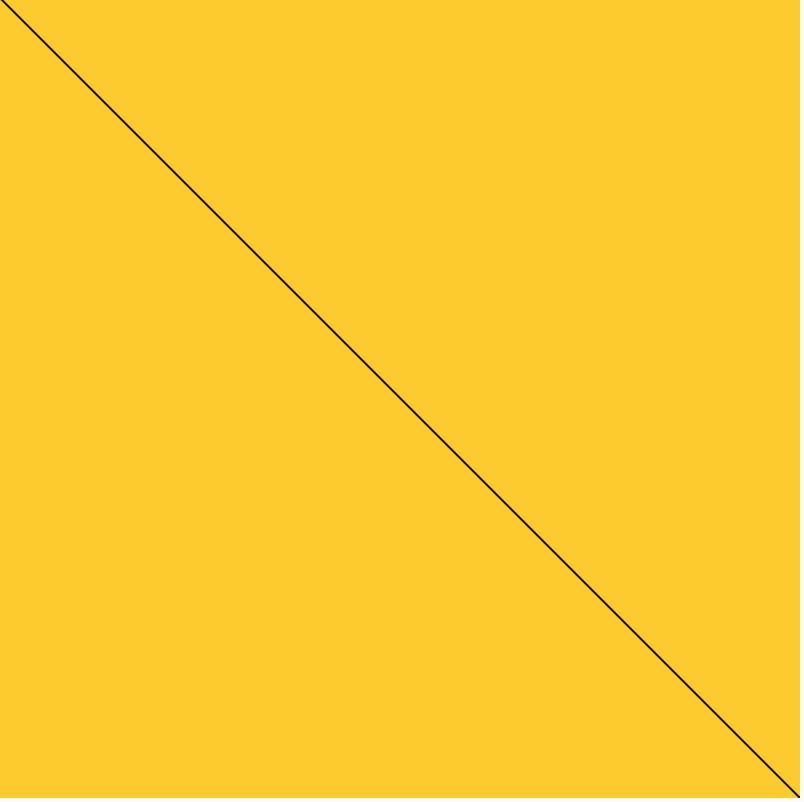
But wouldn't it be tiresome keep writing multiple calls to line()? We'd also need to be mindful of the 1000 x 500 canvas dimensions**. A great solution to this problem is using for loops*!
Loops and Loops of Lines
For the wall drawing, we need to draw enough lines to resemble the sketch above. line() is definitely going to be useful.
for loops are a particularly handy tool for drawing lines because we can control the limit of iterations as well as the number of steps each time. Since there are four parts, we'll need 4 for loops.
*While the instructions do not explicitly say, I drew the lines such that they were stretching 500 pixels-tall, the height of the canvas. Their width will be each be 1/4 of the canvas width, 250 pixels-wide.
Part I - Vertical Lines
To draw this first part, we know that each vertical line must be 500 pixels-tall. Therefore, we also know our y-coordinates: (x1, 0, x2, 500). In the loop, to keep space between the lines, the x-coordinates are going to change by 5 until they get to the 250-pixel mark in the canvas.
Here is what it looks like:
for(let x = 0; x < 250; x +=5) {
  // line code here
}
Next, the line code with the coordinates x, 0, x, 500:
for(let x = 0; x < 250; x +=5) {
  line(x, 0, x, 500)
}
And here is what we get:
function setup() {
    createCanvas(1000,500)
}

function draw() {
    for(let x = 0; x < 250; x+=5) {
        line(x, 0, x, 500)
    }
}
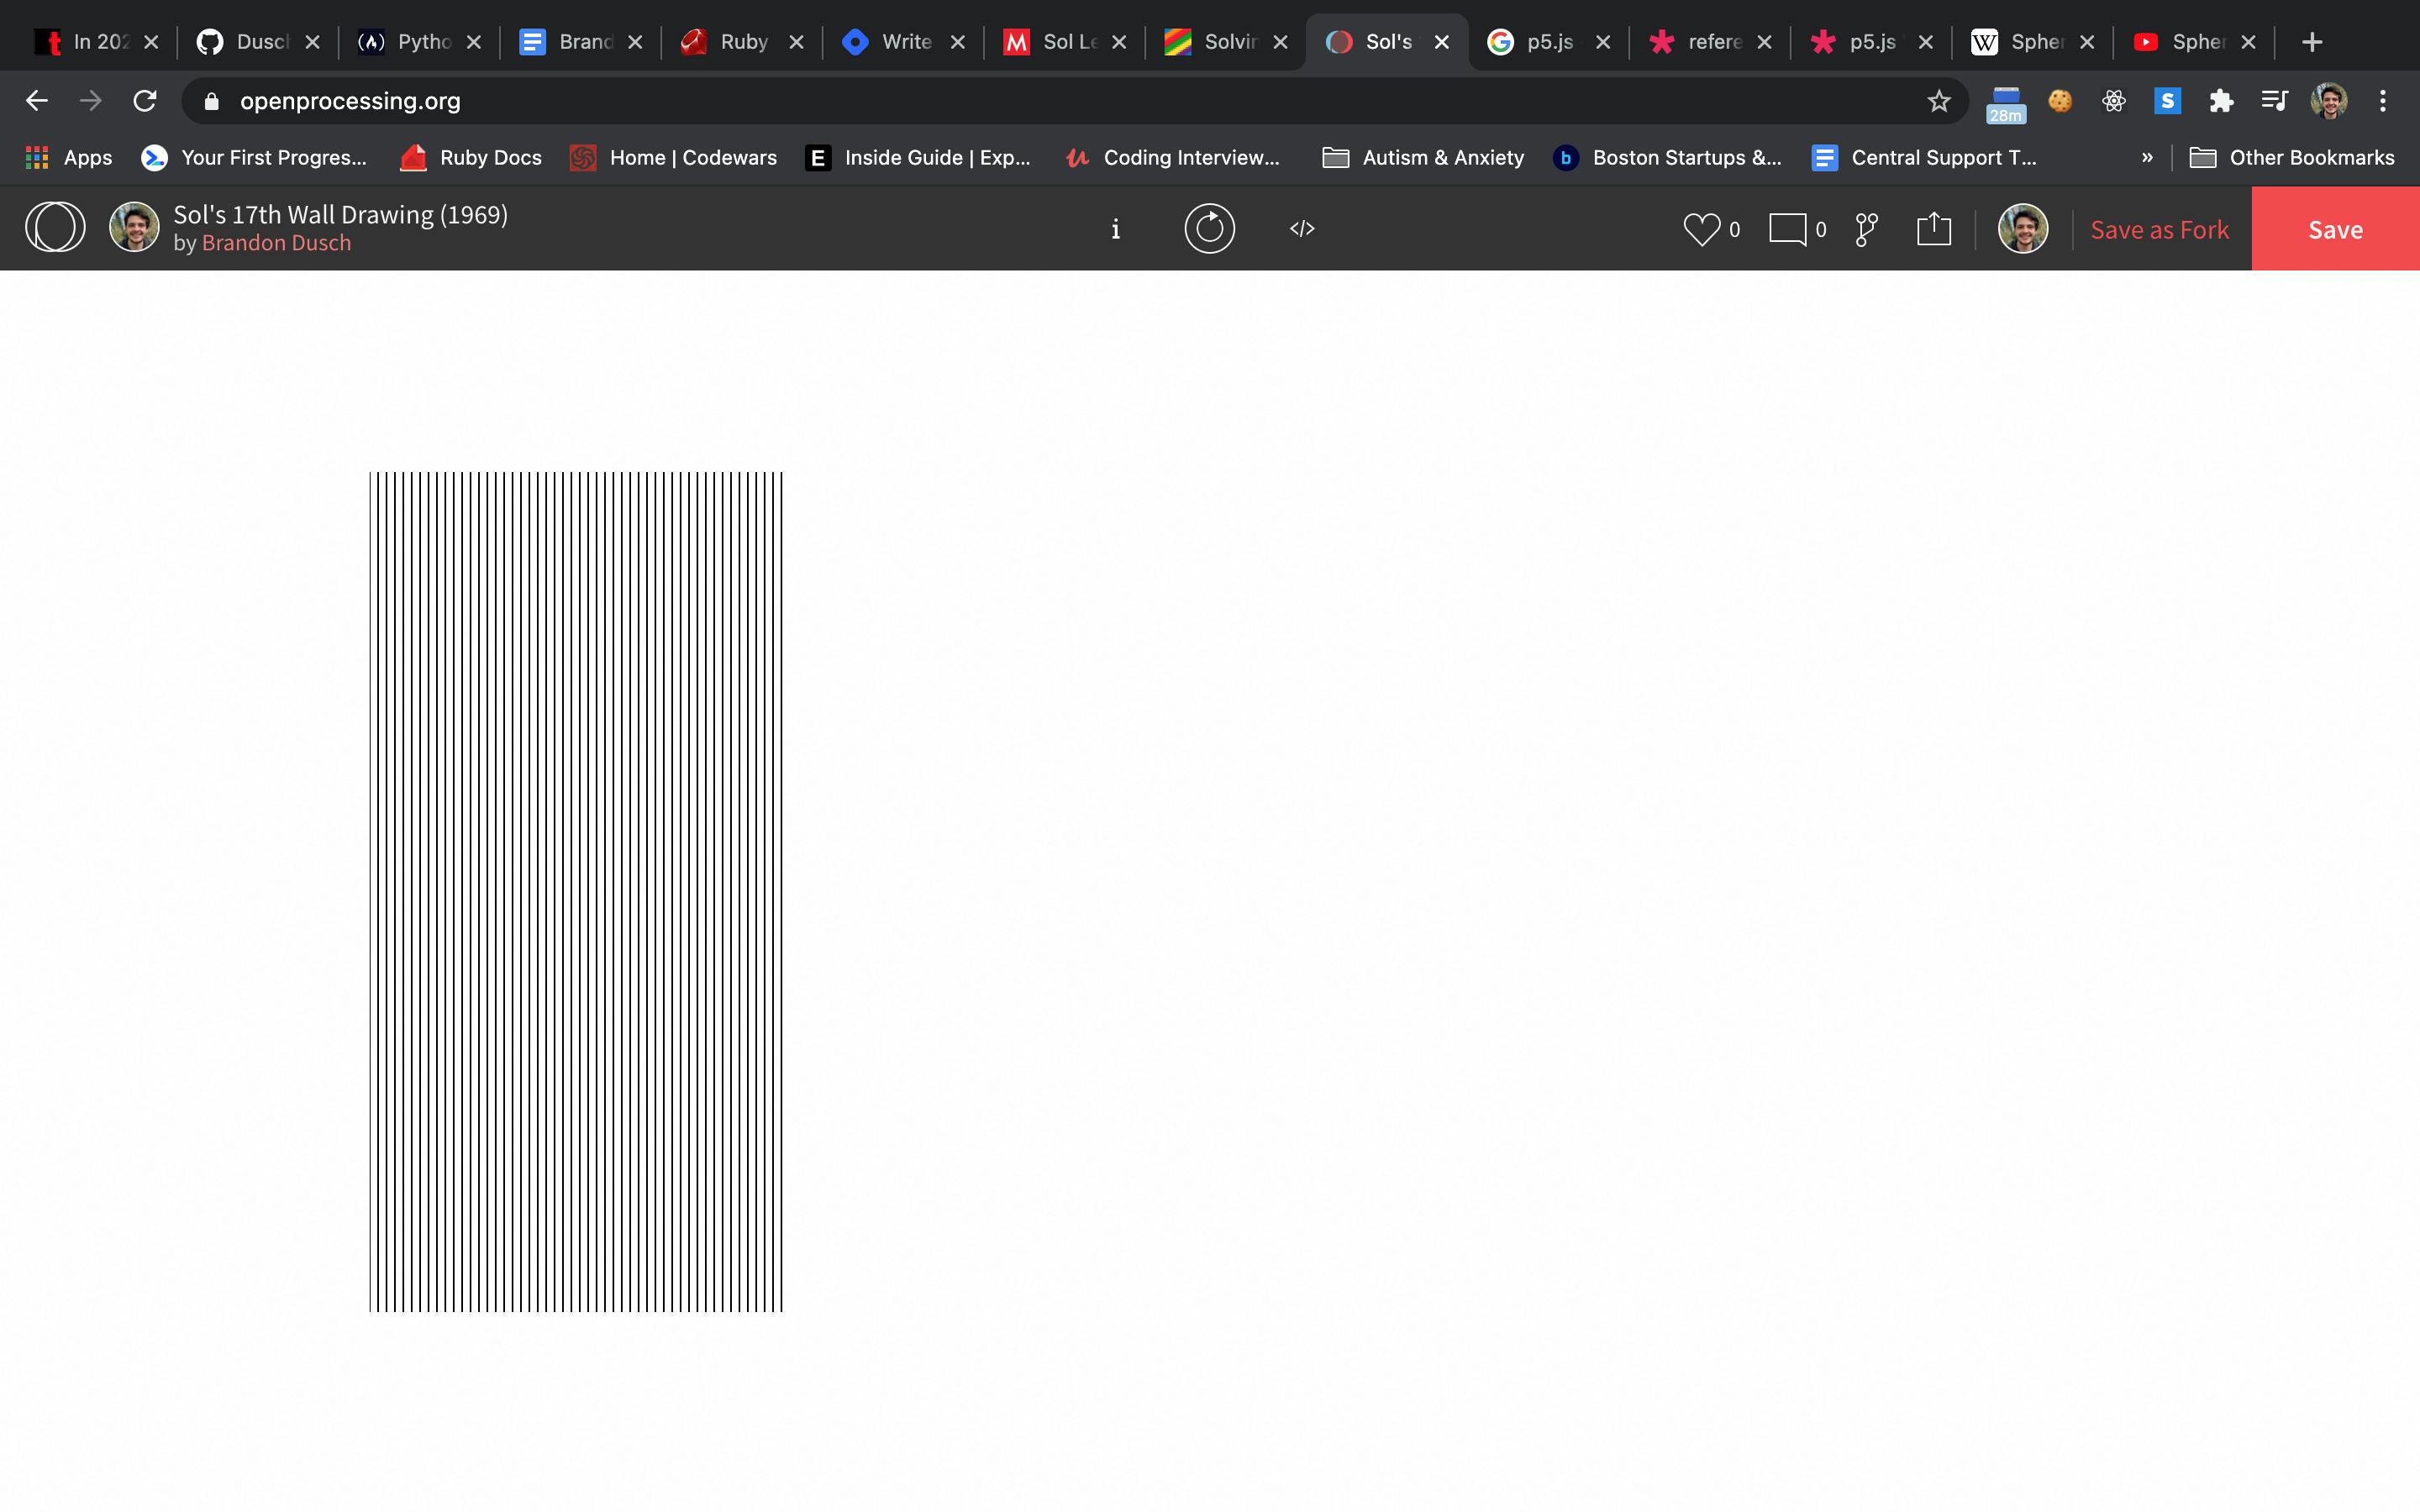
Woot woot! We have drawn the first part of our wall drawing! Onward!
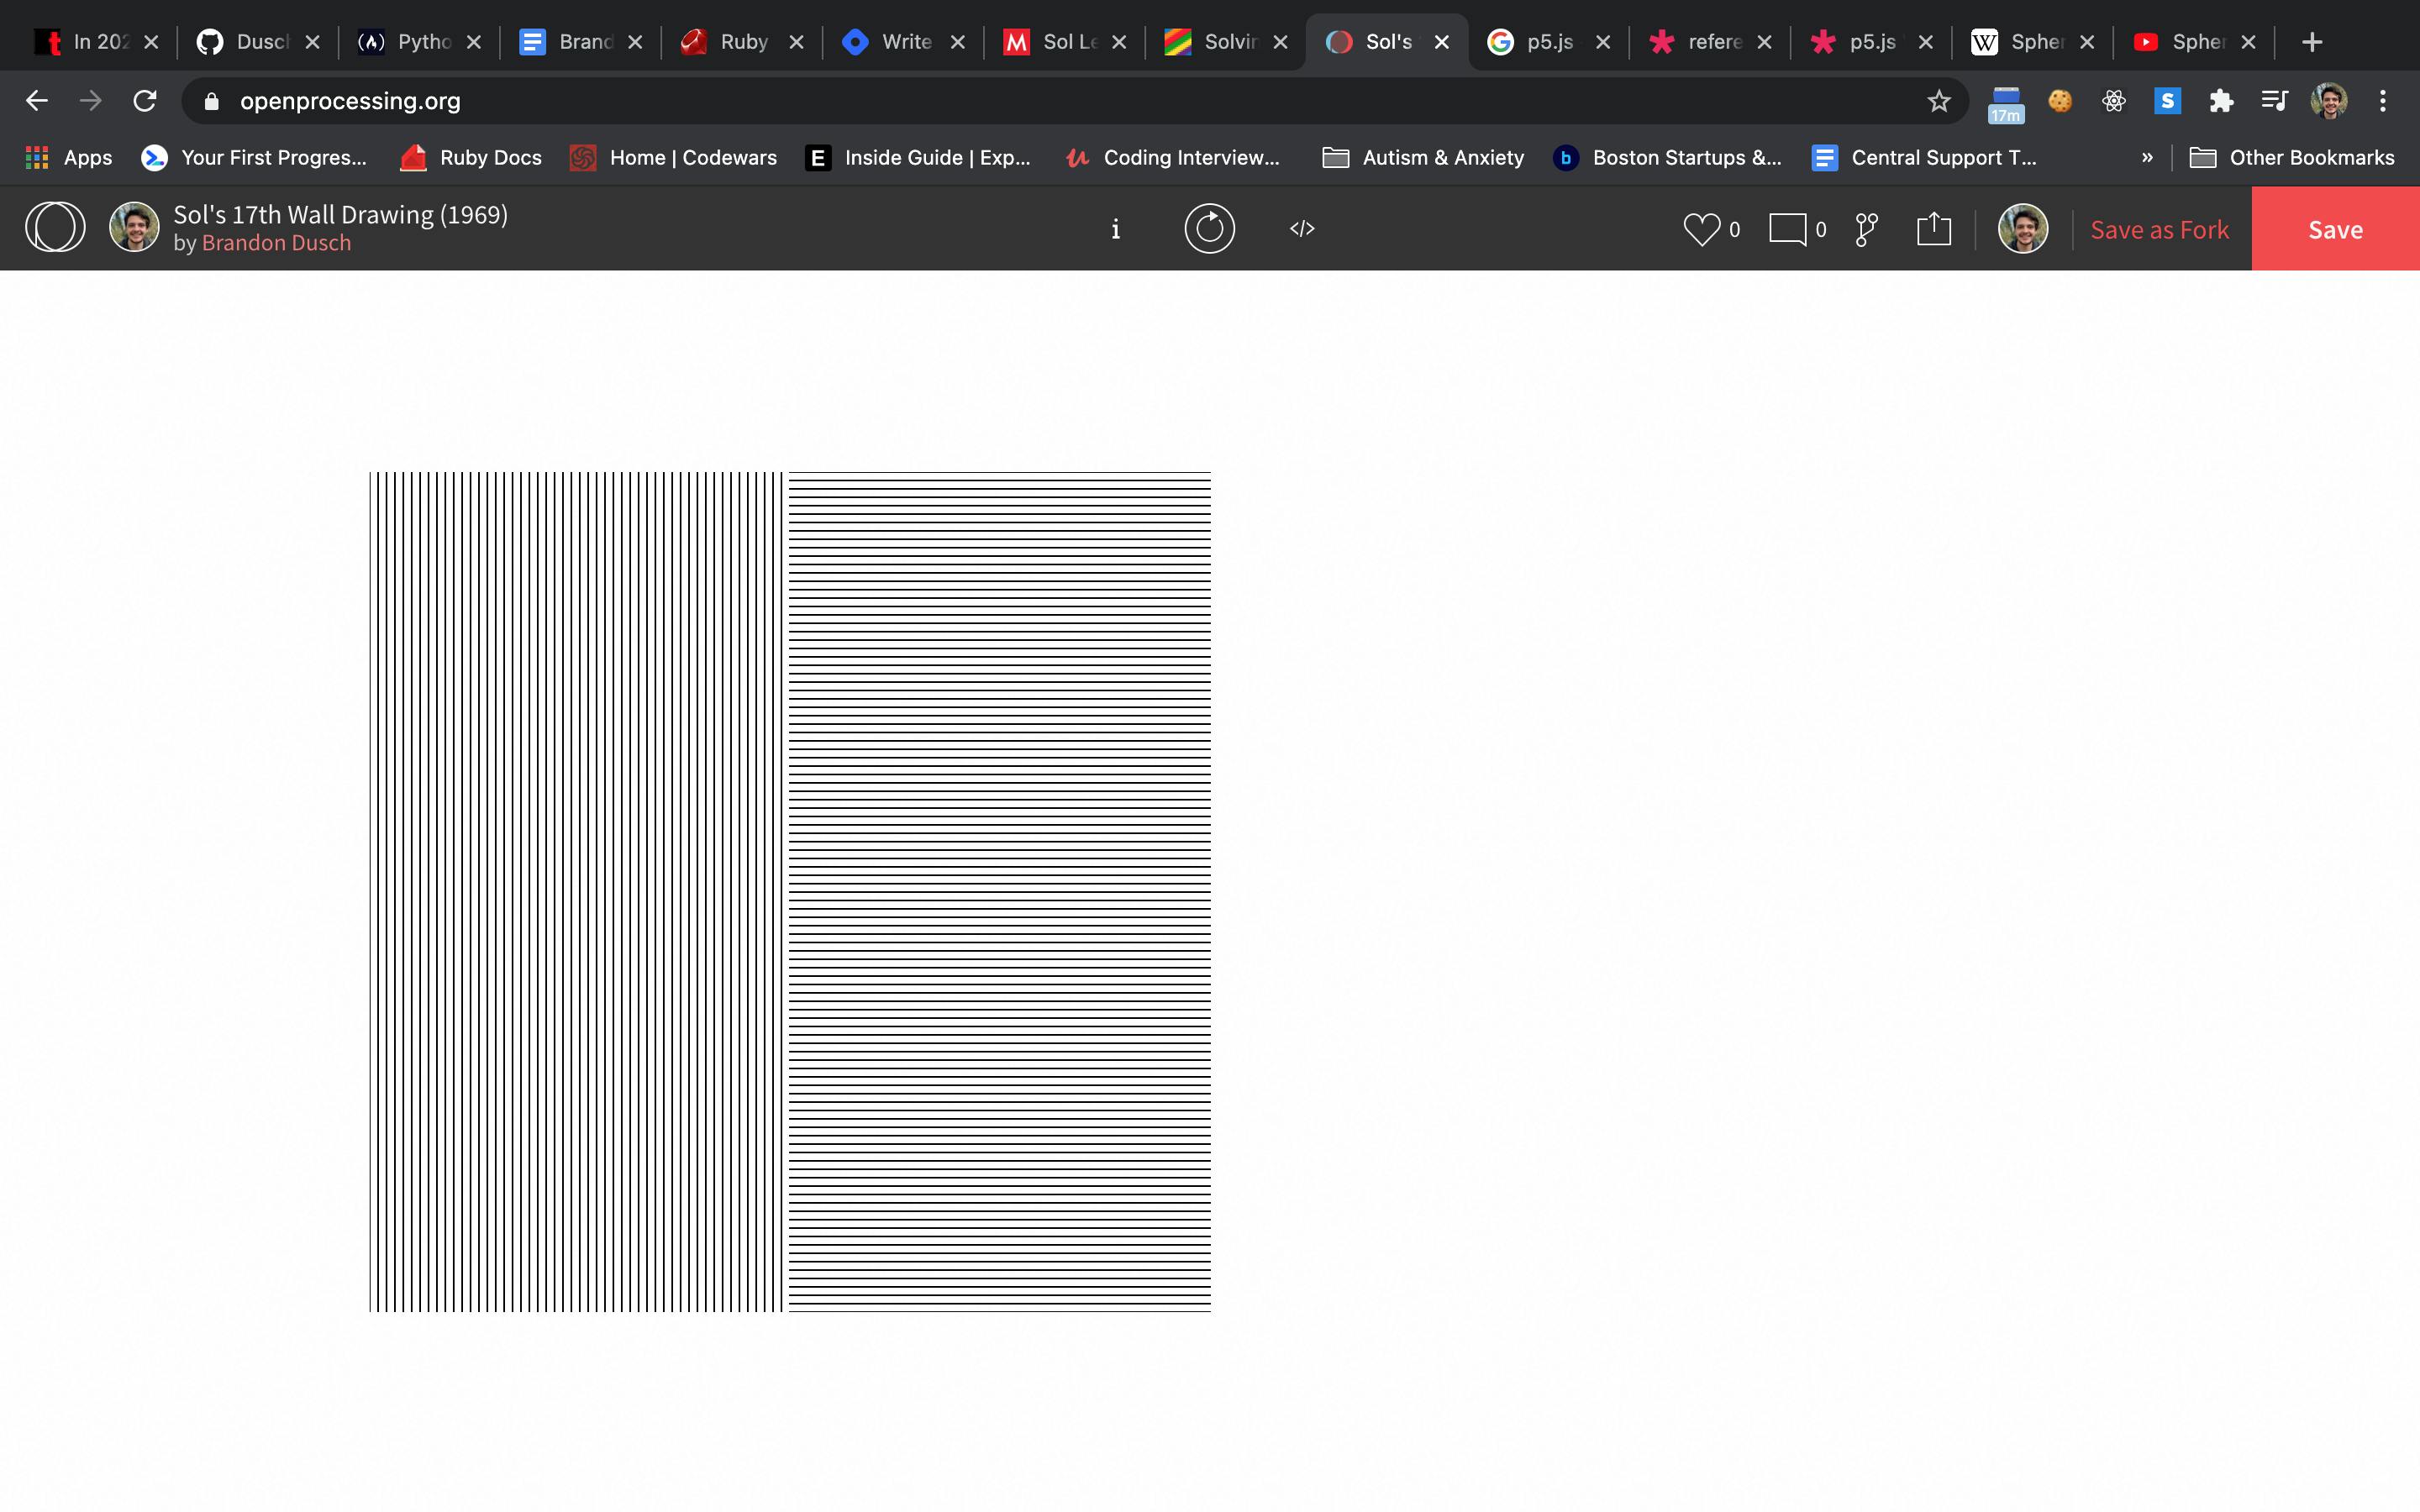
Part II - Horizontal Lines In this part, we are dealing with horizontal lines that go from left to right. Unlike the last part, where we knew the height of each line, in this part we know the width of each line: 250-pixels wide! This is because, since each line spans the width of the entire "quarter" of the canvas, its width is 250.
This part picks up where the last part left off at the 250-px mark. That means that each line will stretch from the 250-px mark to the 500-px mark. Therefore, the x-coordinates for each line won't change and will always be 250,500.
The for loop for the horizontal lines will traverse every 5 y-coordinates, drawing line() each time, until we've spanned the entire 500-px height of the canvas:
  for(let y = 0; y <= 500; y+=5) {
    line(250, y, 500, y)
  }
Nice :) Let's move on to the next part.
Part III - Left-Diagonal Lines The last two parts of the canvas are definitely more challenging to draw. Unlike Parts I and II, where we could draw lines with either a constant x- or y-coordinate, the last two parts deal with diagonal lines.
One way I've found is by drawing each piece of third part from different starting points up to certain point, but completing it nonetheless. Imagine you divide the third part horizontally and draw diagonal line through each half:
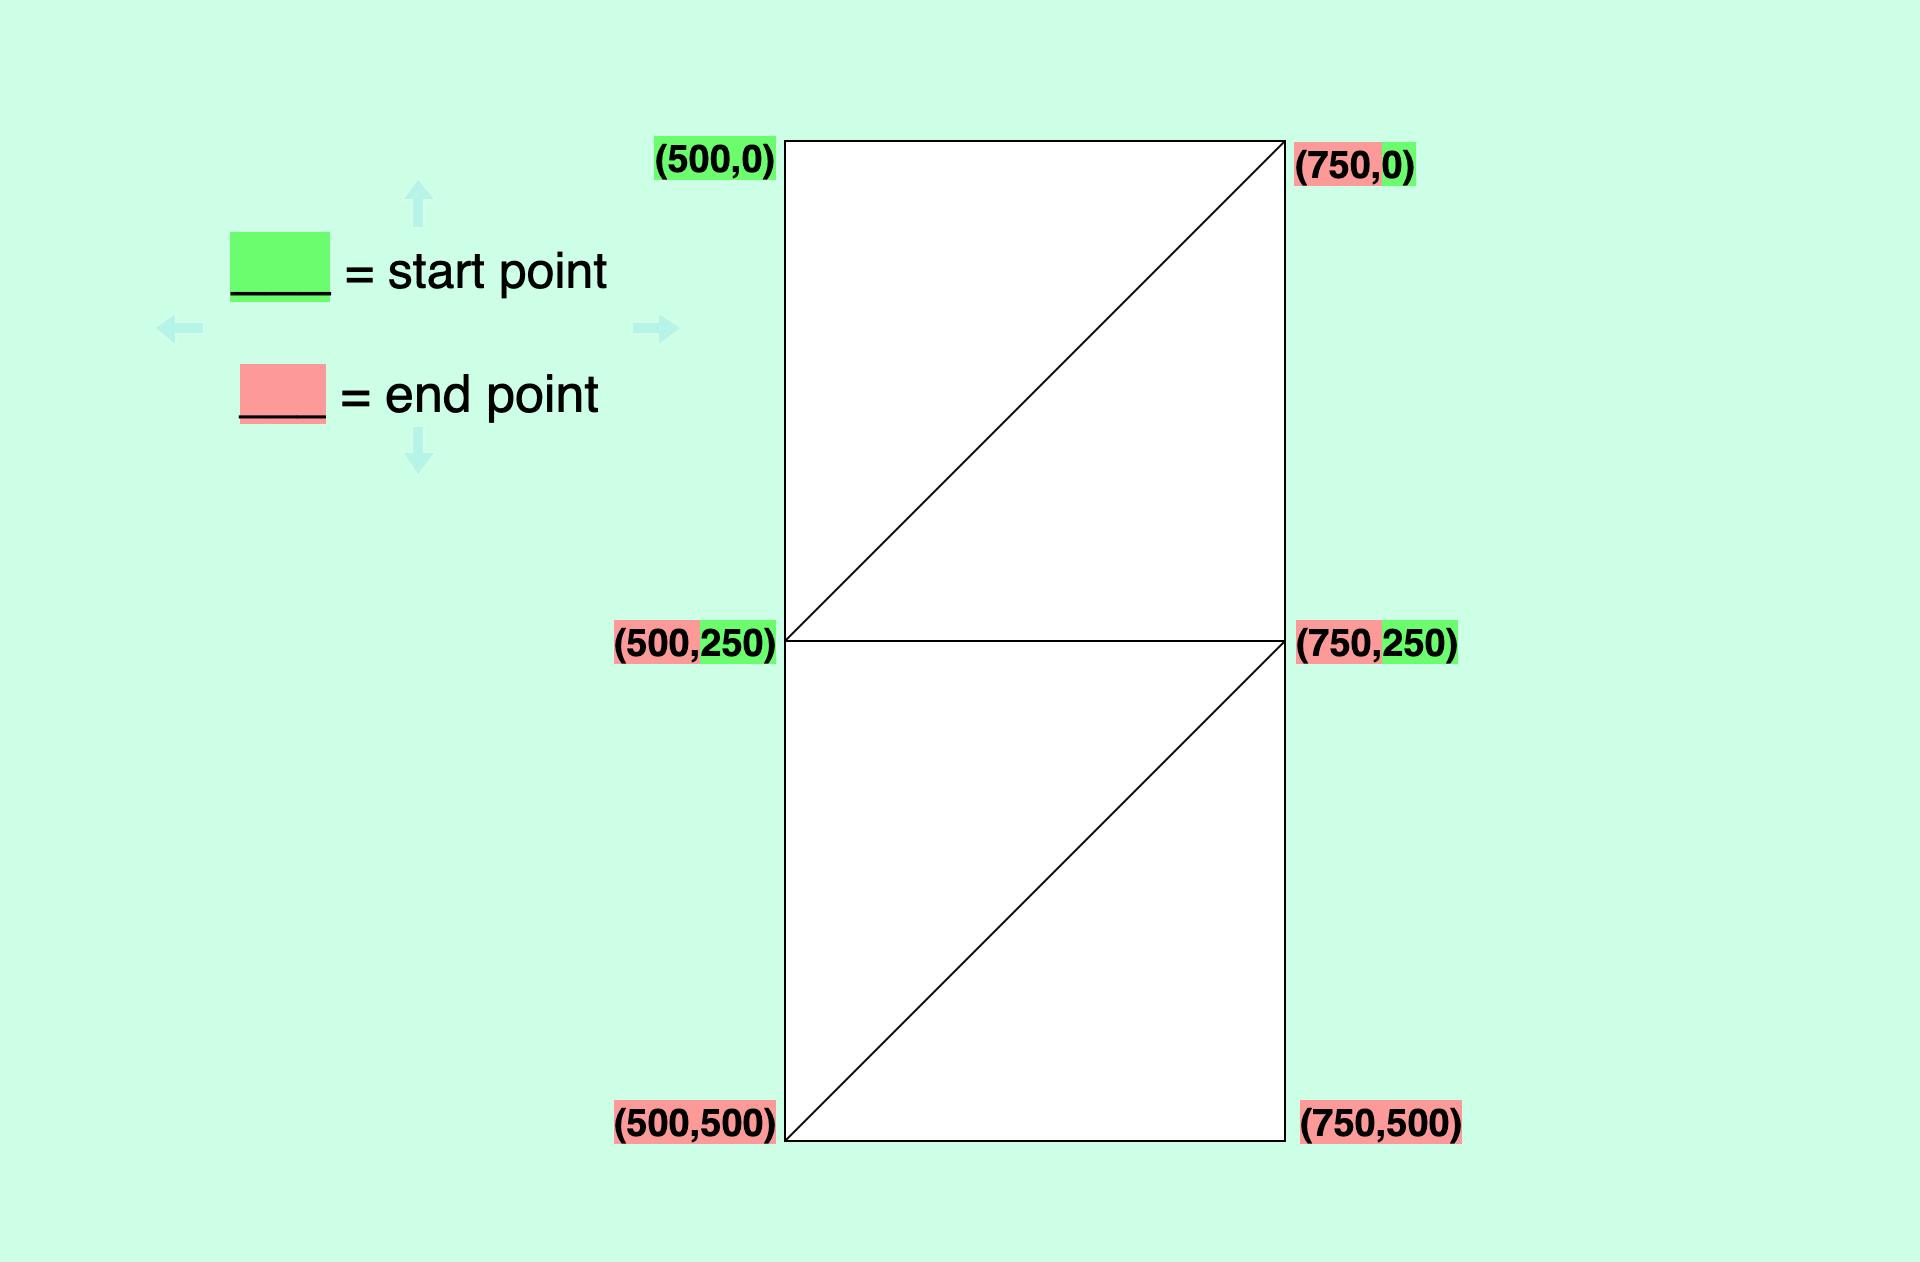
This rough sketch outlines my general think about how the lines could be drawn in a sort of fragmented way, where each triangle picks up where the last one left off. Hence, this is why some of the coordinates are doubly marked.
I also noticed that as each line is drawn in the triangle, y1, and x2 coordinates would change while the x1 and y2 coordinates remained constant.
Following this logic, we can create a for loop and do the following:
  for (let i = 0; i <= 250; i += 5){
    line(500, i, 500+i, 0);
    line(750, i, 500+i, 250);
  }
and here's what we get with the rest of our wall drawing:
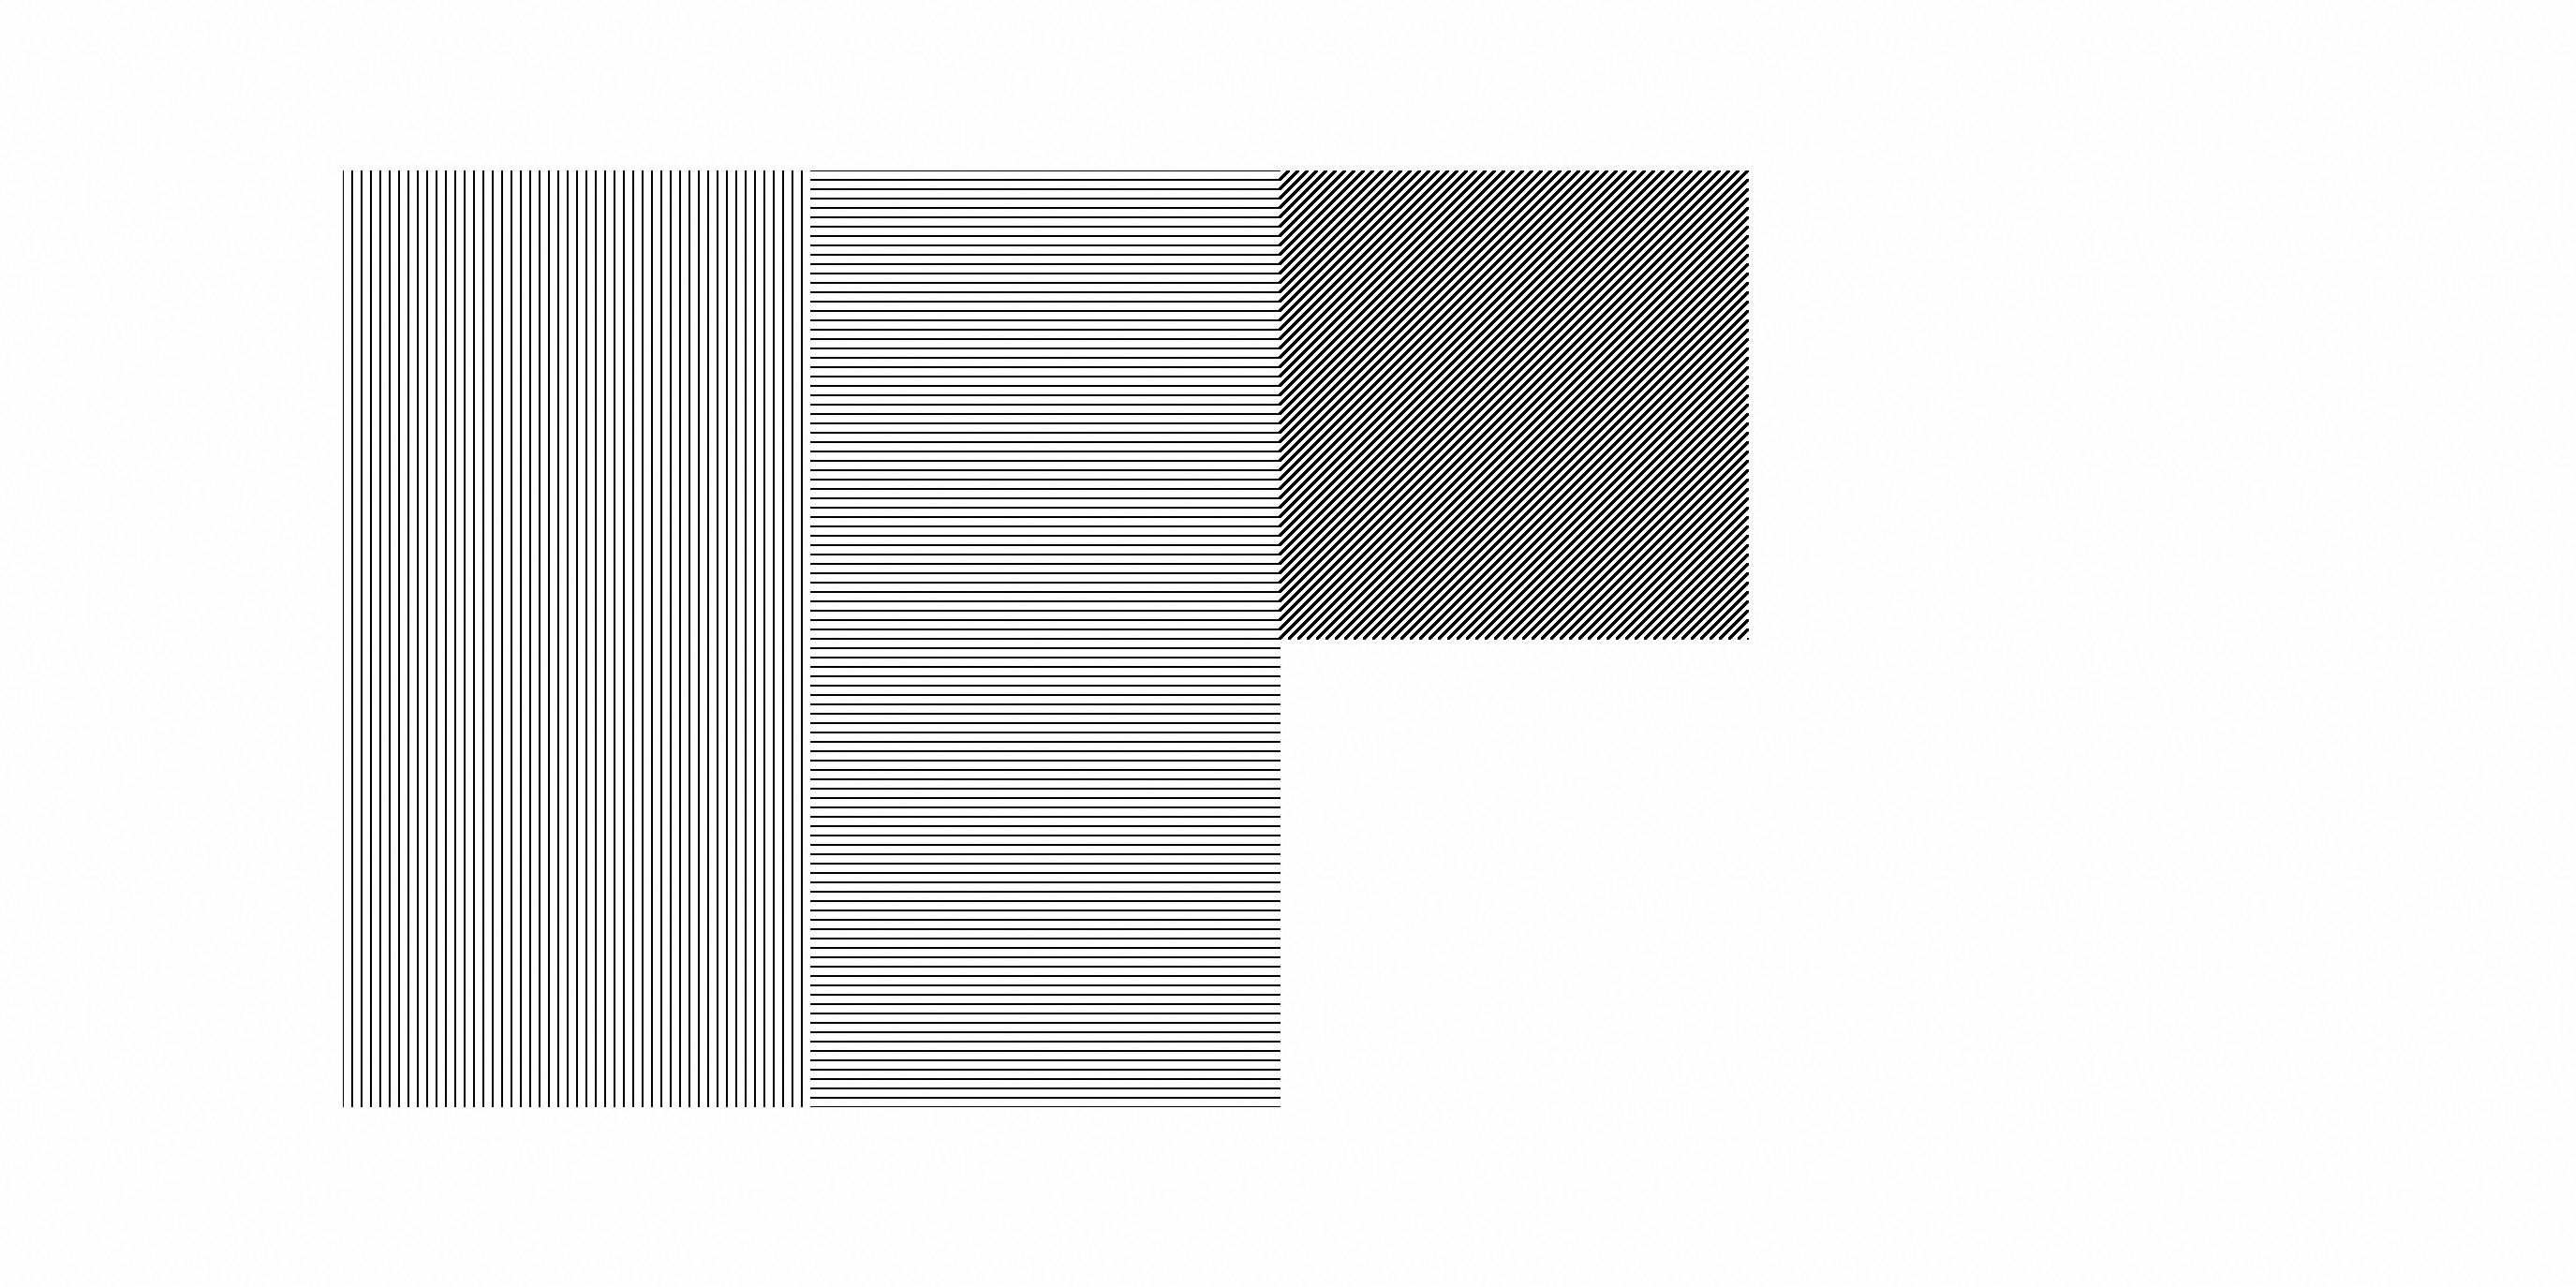
Sweet! So how can we draw the rest of the third part? We can only iterate up to 250 to evenly draw the lines, which puts us at the 250px mark of the canvas's height. Therefore, we should add 250 to our y1 coordinate to start at the correct place and finish the last two triangles:
  for (let i = 0; i <= 250; i += 5){
    line(500, 250+i, 500+i, 0);
    line(750, 250+i, 500+i, 250);
  }
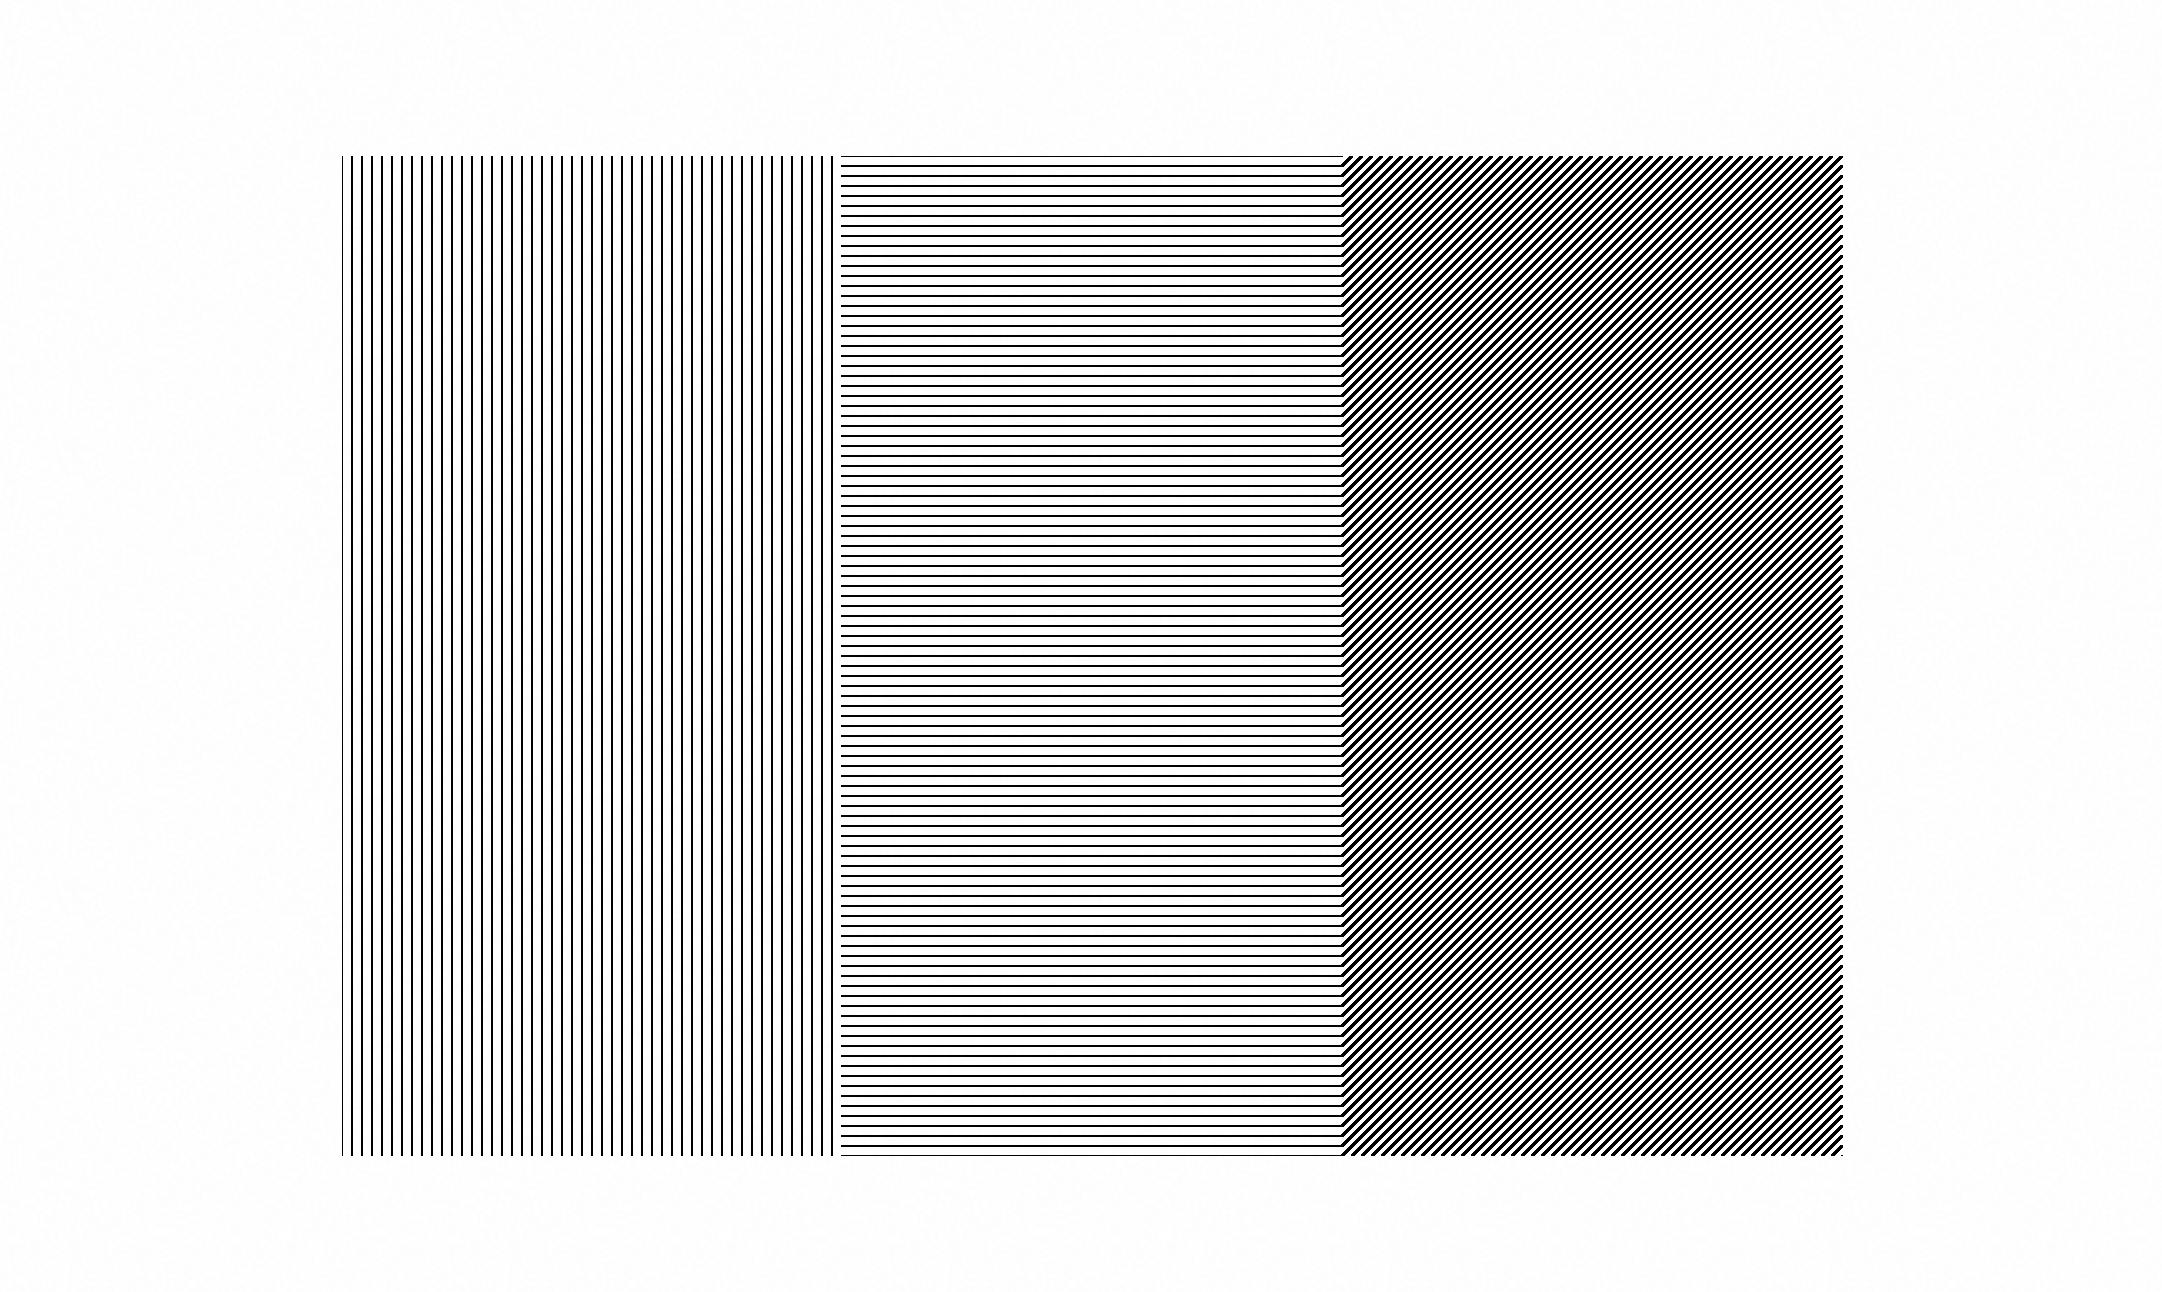
Part IV - Right-Diagonal Lines For the fourth and final part of our wall drawing, we need to draw diagonal lines going in the opposite direction.
Like last time, imagine you divided the part into two squares and bisected each line to create four triangles, keeping in mind where you are coordinate-wise in the canvas:
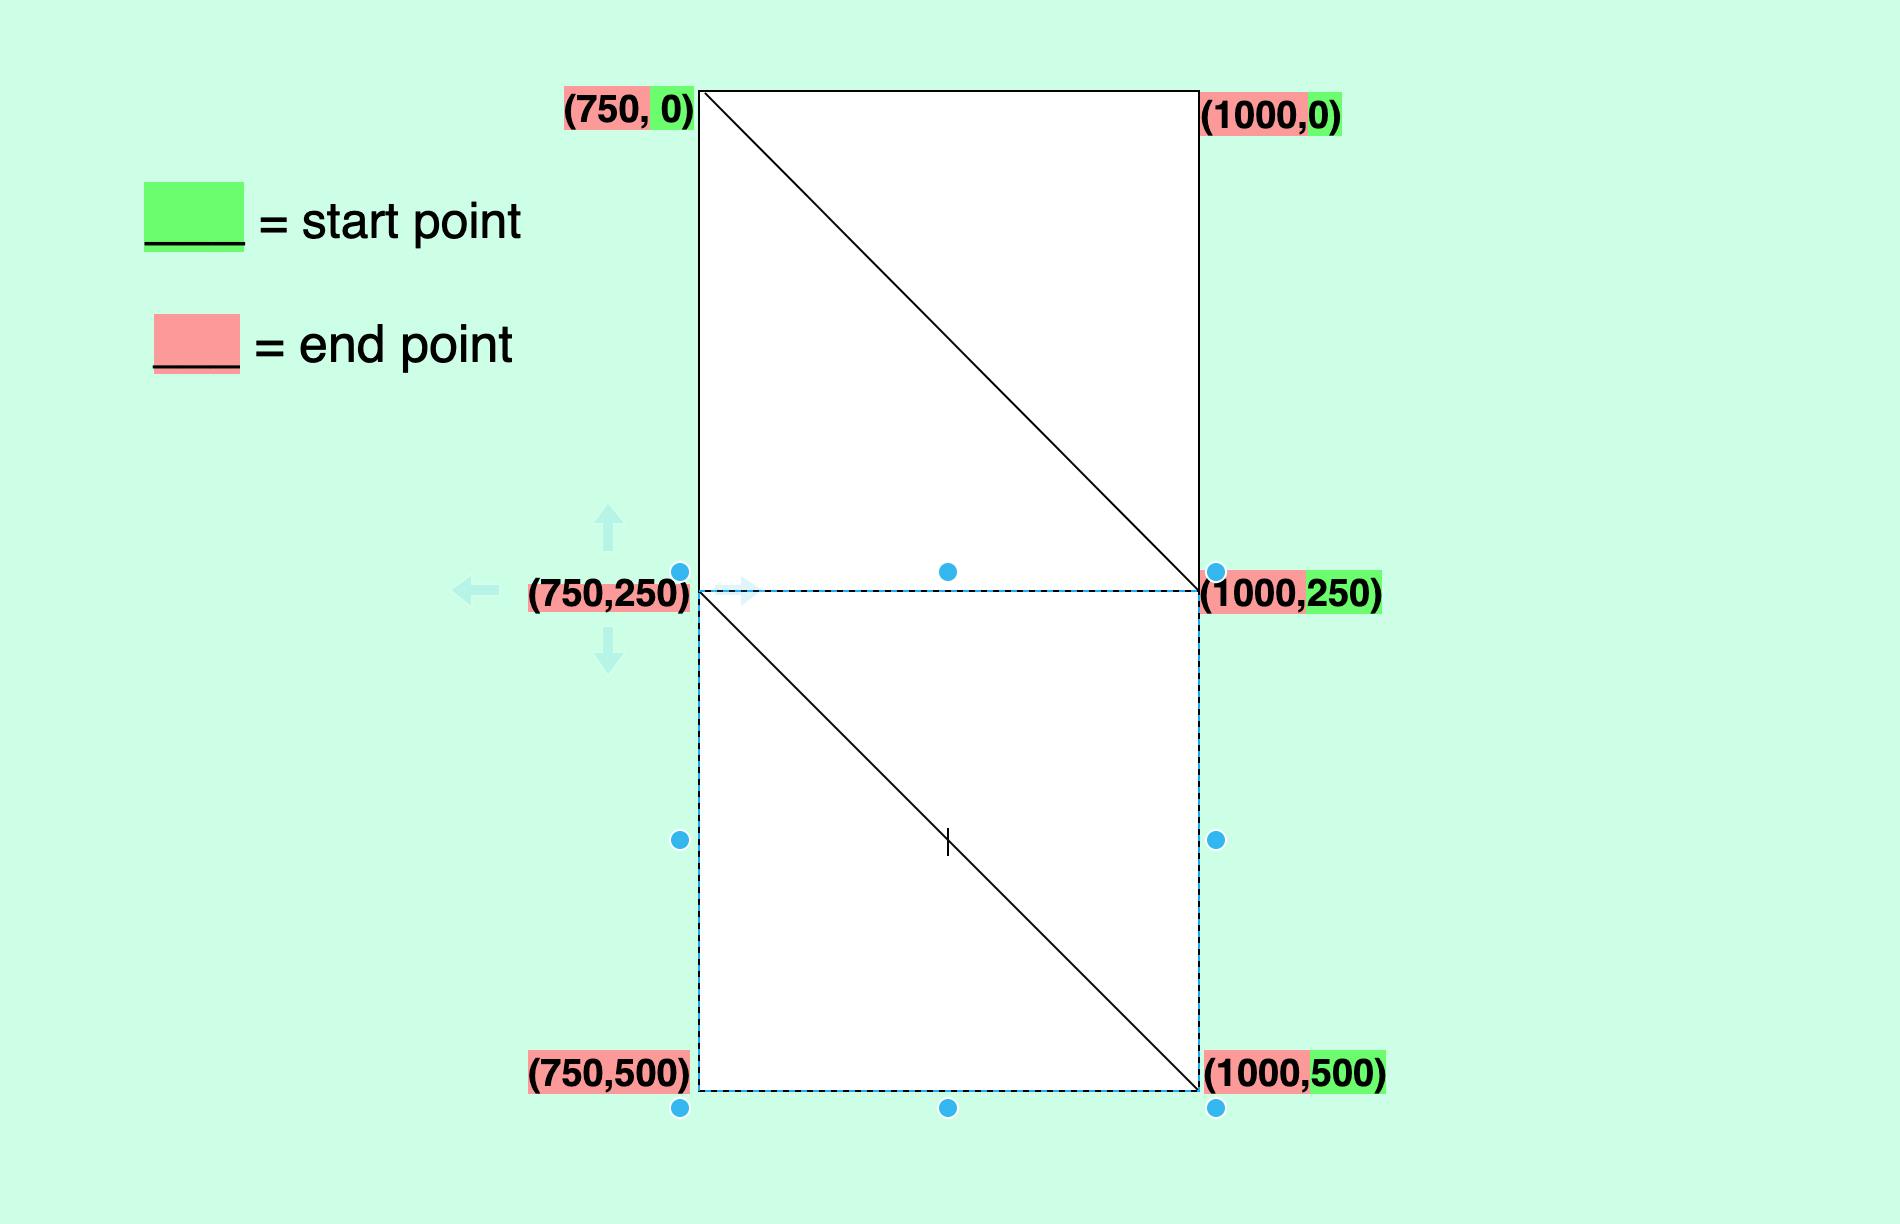
Our start and stop points seem to have been rearranged due to the direction change. Starting at (1000,0), as lines are drawn towards the end of the first triangle, the x1 and y2 changing according to iteration.
line(1000 - i, 0, 1000, i)
When the next triangle is drawn, lines drawn going away from the hypotenuse starting at (750, 0), the y1 and x2 coordinates change:
line(750, i, 1000-i, 250)
If we put it in a for loop with a limit of 250, here's what we get:
  for (let i = 0; i <= 250; i += 5){
    line(1000-i, 0, 1000, i);
    line(750, i, 1000-i, 250);
  }
Like the previous part, we add two more line() calls with 250 added to the y1 coordinates:
  for (let i = 0; i <= 250; i += 5){
    line(1000-i, 0, 1000, i);
    line(750, i, 1000-i, 250);
    line(1000-i, 250, 1000, i);
    line(750, 250+i, 1000-i, 250);
  }
And we have finished our Sol Leweitt Wall Drawing!
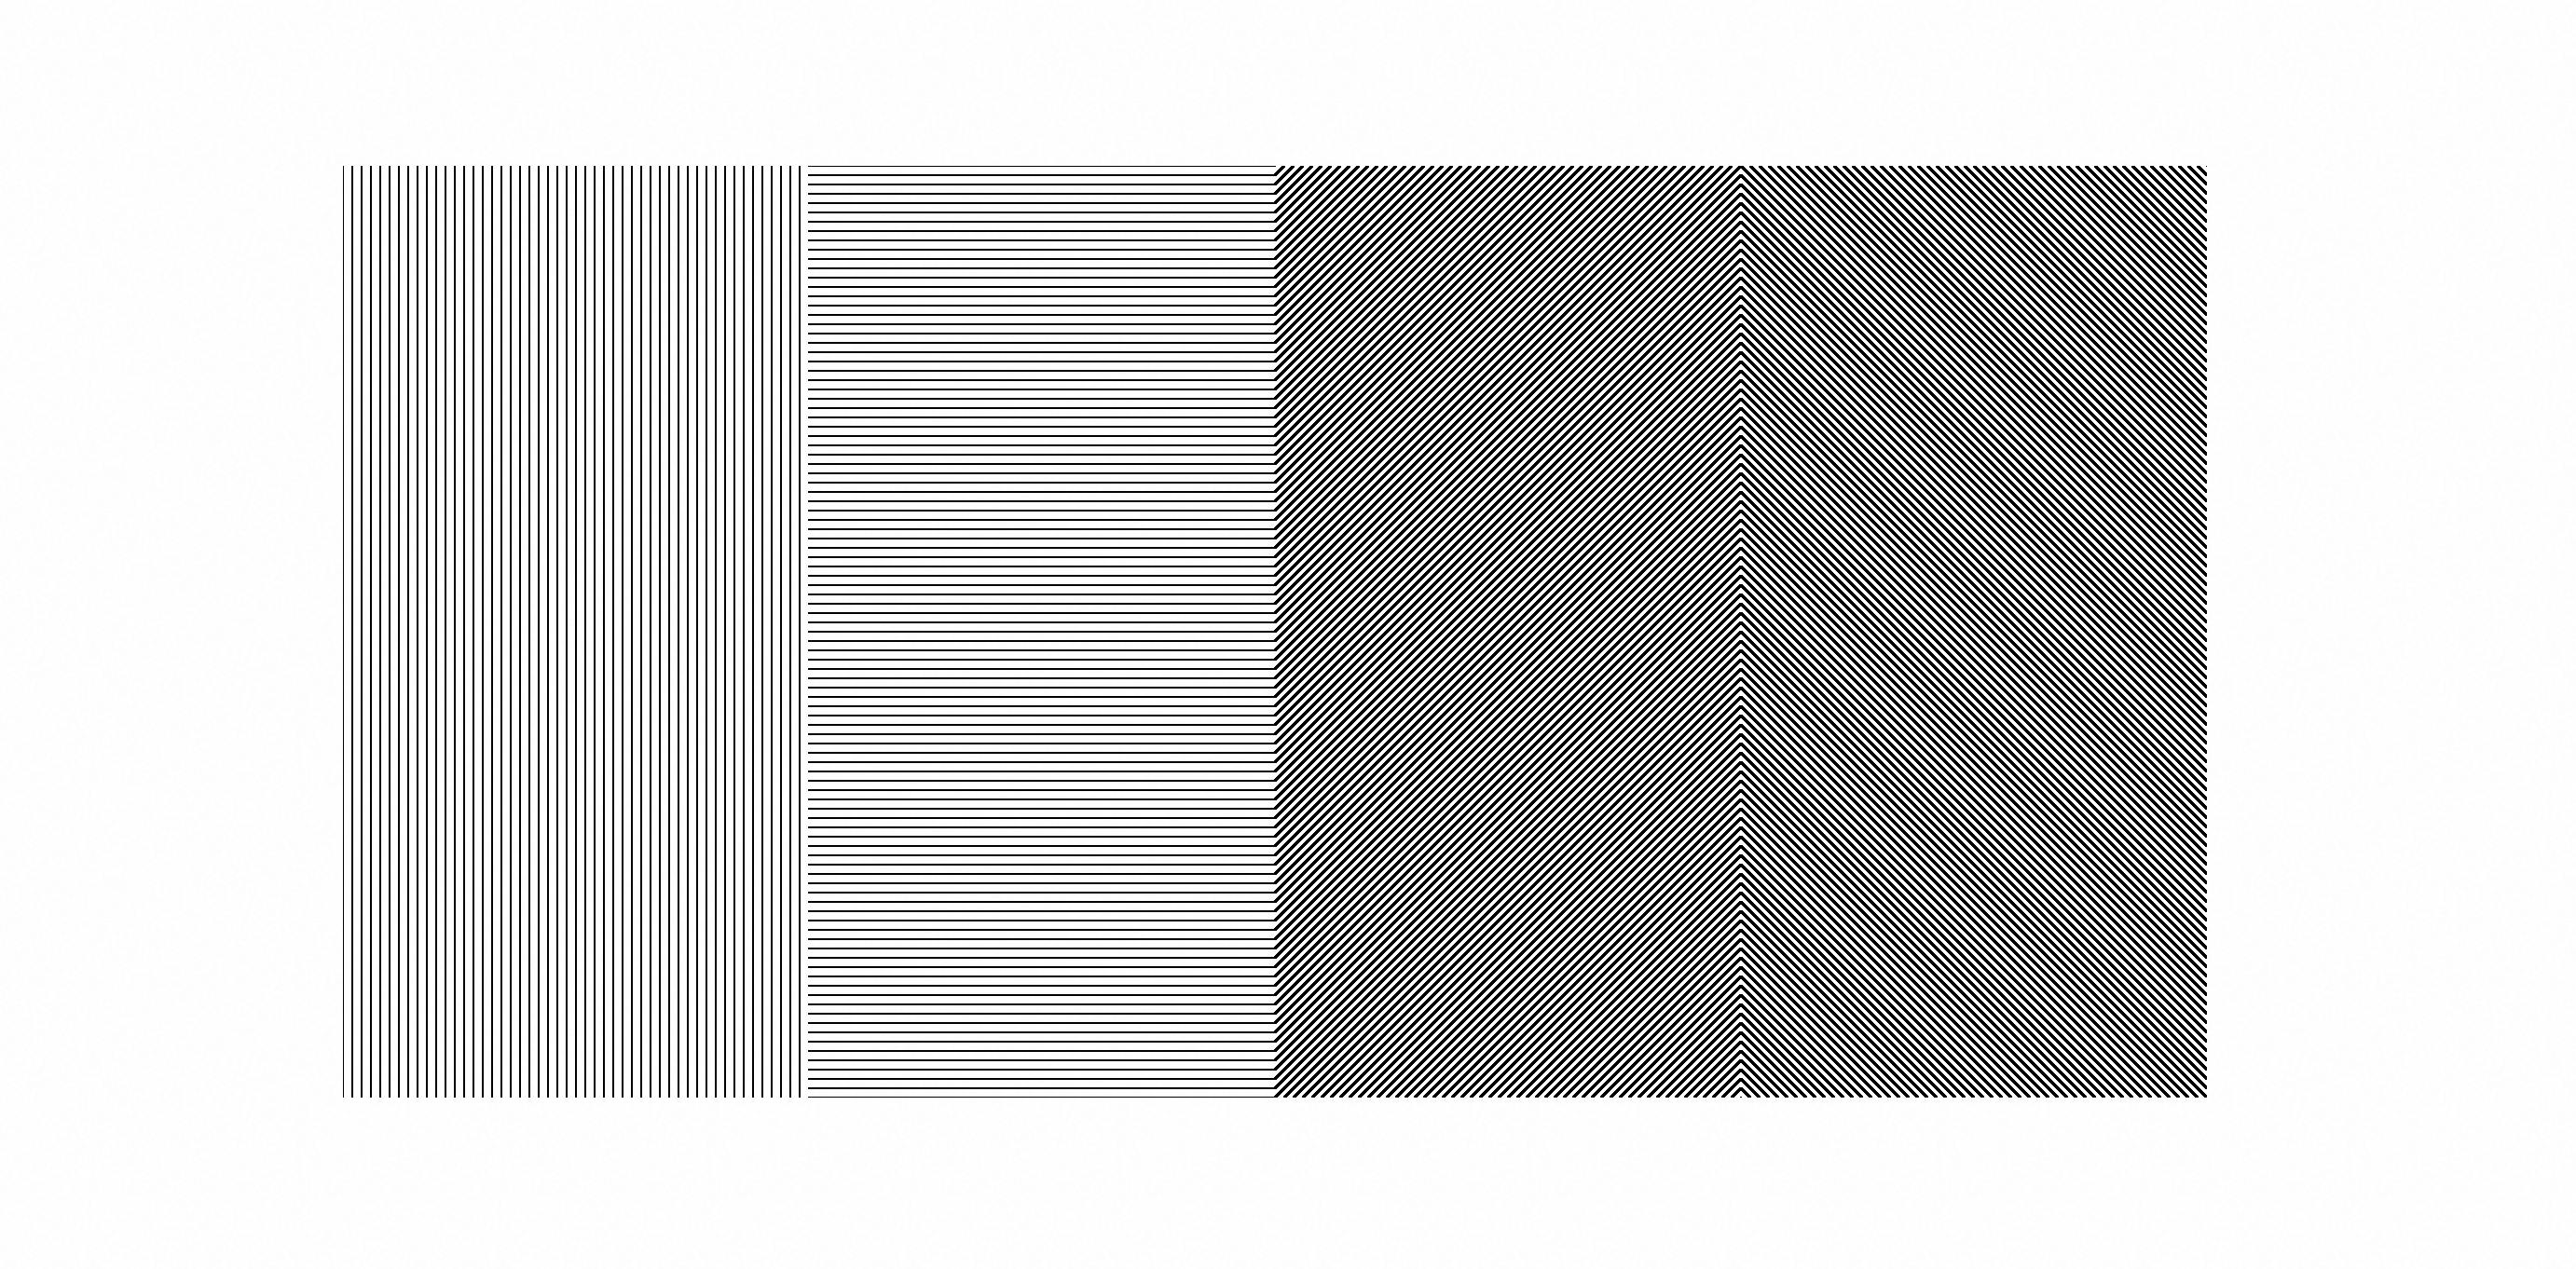
Not bad for a first p5 sketch, huh?
Resources
Create Your Own Sol Lewitt (with p5.js)

