# Leveraging GraphQL to Supply Data to Your Portfolio Site

#### Introduction
One of the reasons why Gatsby is so powerful is that it comes with GraphQL built-in. [GraphQL](https://graphql.org/) is a querying language that allows developers to query for and manipulate their site's data (images, content, links, etc.). Its methodology for doing this borrows some of its terms from [graph theory](https://en.wikipedia.org/wiki/Graph_theory), like nodes and edges. [While there are definitely other ways to query your site data besides GraphQL](https://www.gatsbyjs.com/docs/why-gatsby-uses-graphql/) , doing so has many limits. GraphQL simplifies a lot site complexity, including:
* Storing site data, such as images, links and node properties, in a single place
* Utilizing `edges` and `node` to make queried data parsable and accessible
* Improving site loading/ performance by lazy-loading images (using `gatsby-image`)
For this tutorial, we're going to leverage the power of GraphQL by building a portfolio site with Gatsby. This site will use GraphQL to query for site data including images and portfolio project information.
### Prerequisites
In order to get the most value out of this tutorial, you will need the following:
* General knowledge of Gatsby, its plugins and its file structure
* Solid understanding of React (since Gatsby itself is a React-based framework)
* Comfortable parsing and manipulating JSON objects (GraphQL queries return JSON objects)
You will also need to have these Gatsby plugins add:
* `gatsby-source-filesystem` - loads site data to Gatsby's internal data store
* `gatsby-transformer-json`- converts data into format to be queried by GraphQL
* `gatsby-plugin-sharp` - optimizes images
* `gatsby-transformer-sharp` - allows access to optimized image data
* `gatsby-image` - allows for lazy-loading of images
### Step 1 - Start a New Gatsby Site and Install Plugins
The first thing to do is to create a new Gatsby site on the terminal/ console:
```
gatsby new portfolio-site
```
This will take a minute or so to finish installing all the necessary files and folders.
Next, we're gonna sort of "clean up" the default page (`src/index.js`) by removing the code that renders the default text and images for a new Gatsby site. If you want, you can also change the header that says "Gatsby Default Starter" by going into `gatsby-config`, into the `siteMetaData`, and changing the `title` value. After removing the content, if you run `gatsby develop`, the page should look like this:

Afterwards, in the terminal, go ahead and `cd` into `portfolio`, or into whatever name you gave it.
Next, we'll need to install the necessary plugins to make GraphQL queries possible:
```
npm install gatsby-source-filesystem gatsby-transformer-json gatsby-plugin-sharp gatsby-transformer-sharp gatsby-image
```
Check the `package.json` file to see if the plugins were added.
Afterwards, do **not** forget to edit the `gatsby-config.js` to actually enable the plugins. And be sure to change this line:
```
'gatsby-transformer-json',
{
resolve: `gatsby-source-filesystem`,
options: {
name: `images`,
path: `${__dirname}/src/images`,
},
```
...to this line:
```
'gatsby-transformer-json',
{
resolve: `gatsby-source-filesystem`,
options: {
name: `images`,
path: `${__dirname}/data/images`,
},
```
And delete the `src/images` folder to avoid path conflicts at build-time. I found this necessary because I considered my images to be a part of my data. Therefore, it made sense to lump all my image files in my `data` folder.
### Step 2 - Create a Top-Level `data` Folder, Then Add Data
To get the most out of Gatsby, we're going to create a `data` folder at the top-level of the site. Inside, we can organize the data however we want. But let's keep it simple and create an `images` folder followed by a `projects.json` (outside of `src`, inside of `data`).
Presumably, all images in the site will go in the `images` folder. This includes images for the main content, the side content, as well as thumbnail images for the portfolio projects themselves.
The `projects.json` file will be used to store site meta data regarding the projects:
```
// data/projects.json
[
{
"title": "Project A",
"github_url": "source code link here",
"demo_url": "demo link here",
"image": "./images/rails-fitness-image.jpg",
"description": ""
},
{
"title": "Project B",
"github_url": "source code link here",
"demo_url": "demo link here",
"image": "./images/nyt-bestseller-cli-image.jpg",
"description": "Users can search for the NYT Bestsellers List by date, filter by category and learn more"
},
{
"title": "Project C",
"github_url": "source code link here",
"demo_url": "demo link here",
"image": "./images/weather-app-image.jpg",
"description": ""
}
]
```
This is an important step because we'll need this meta data in order for it to be accessible in a GraphQL query.
### Step 3 - Create a Component with Project Information
We're almost about to perform an amazing GraphQL query to utilize everything we've done so far. But before we do that, we'll want to have some way to extract and represent that project information on the site.
Because Gatsby is a *React-based* static-site generator, we can create a component to work as a `ProjectCard` that renders information about a single project. This way, when we query for project data, it will have a place to go.
Let's create a new file, named `projectCard`, inside the `src/components` folder. Next, we'll import `React` in order to create the `ProjectCard` component.
```
import React from 'react'
const ProjectCard = () => {
}
export default ProjectCard # allows the component to be imported in another file
```
Remember when we installed `gatsby-image` back in the very beginning? We can import a special `Image` component that allows to access special image properties fetched from the GraphQL query (which we'll see in the fourth and final step).
```
import React from 'react'
import Image from 'gatsby-image'
const ProjectCard = () => {
}
export default ProjectCard # allows the component to be imported in another file
```
Now let's go work on the actual `ProjectCard` component. Notice how it's a functional, stateless component. It can only handle `props`, which we pass in as an argument to the function. Because Gatsby uses modern ES6+ JavaScript, [we can destructure the project object's properties](https://hacks.mozilla.org/2015/05/es6-in-depth-destructuring/) and pick out the ones we want to use. Remember when we set up the project objects and their properties (title, description, image, etc)? Those are the properties we're going to destructure and pass as props to the component. We'll also pass the image data to the `Image` component:
```
const ProjectCard = ({ demoURL, githubURL, imageData, title, description }) => {
return(
)
}
```
### Step 4 - Write a GraphQL Query with GraphiQL
Another sweet feature of Gatsby is that, along with GraphQL, it also comes with a cool interface for writing and testing queries. It's called [GraphiQL](https://www.gatsbyjs.com/docs/running-queries-with-graphiql/) .
GraphiQL can be an especially useful tool for drawing complex GraphQL queries. This was a part of the reason that GraphQL was invented in the first place; GraphiQL makes using it *easier*.
Visually, GraphQL queries look similar to JSON objects and the returned JSON has the exact same shape. What you query for is what gets returned.
Since we wrote an array of objects in our `projects.json` file, we're going to install the `gatsby-transformer-json` plugin to make them queryable by GraphQL.
```
npm install gatsby-transformer-json
```
Then, we'll add some code to our `gatsby-config.js` file to enable the `gatsby-transformer-json`:
```
// gatsby-config.js
...
plugins: [
`gatsby-plugin-react-helmet`,
{
resolve: `gatsby-source-filesystem`,
options: {
name: `project`,
path: `./data`,
},
},
'gatsby-transformer-json',
{
resolve: `gatsby-source-filesystem`,
options: {
name: `images`,
path: `${__dirname}/data/images`,
},
},
...
]
```
Alright! Let's go and write a query! Go to the following url: `[your local host name]/__graphql`. It should look like this:
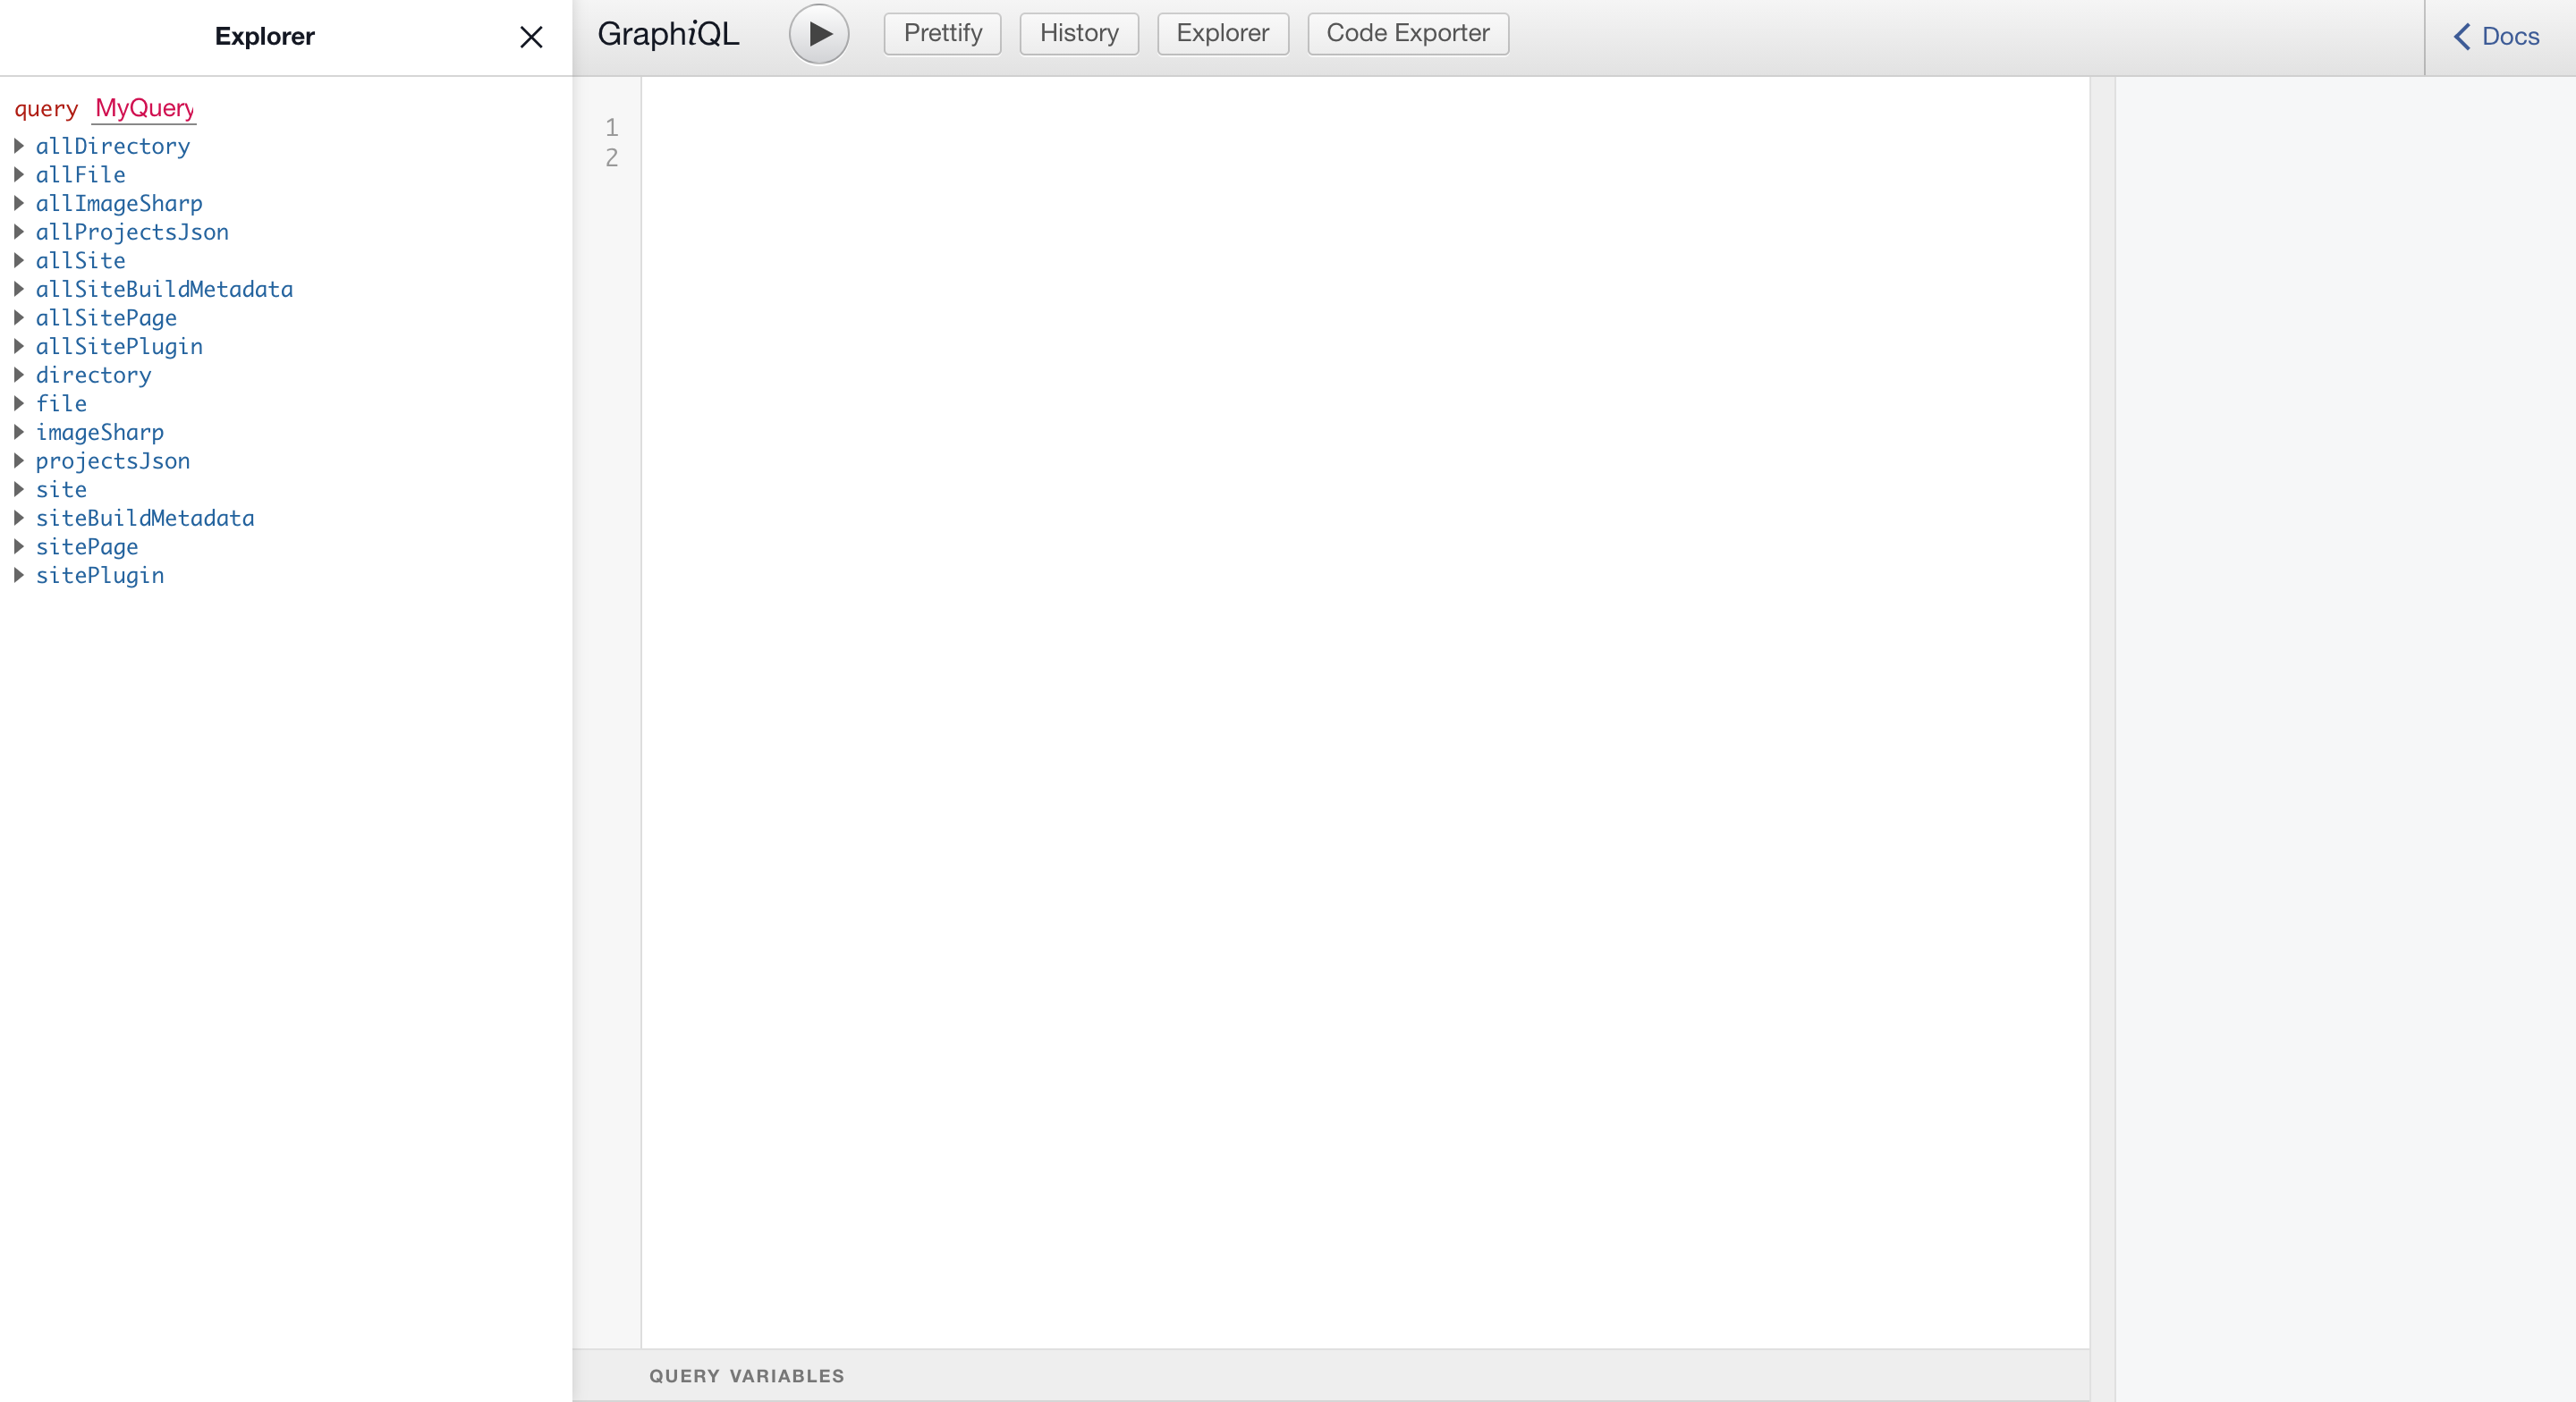
Welcome to GraphiQL! To write a query, you simply click on one of the properties in the "Explorer" column on the left-hand side. What happens as you click on properties on the left is that the query writes itself in the middle. Clicking the "Play" button up top runs the query and, if valid, will return a JSON response.
Here is the query we're going to use:
```
query MyQuery {
allProjectsJson {
edges {
node {
id
title
description
github_url
demo_url
image {
childImageSharp {
fluid {
...GatsbyImageSharpFluid
}
}
}
}
}
}
}
```
***Note***: `...GatsbyImageSharpFluid` gives us access to all the properties in `fluid`, including `base64`, `srcSetWebp` and `originalName`.
This query will return a JSON containing information about each of our portfolio projects, including detailed image information.
To make a query in the actual code base, we'll need to import two essential methods from the `'gatsby'` library in the `src/pages/index.js` file:
* `useStaticQuery` - A special React hook that makes a GraphQL query at build time
* `graphql` - Formats a given string into a GraphQL query
```
import React from "react"
import { Link } from "gatsby"
import Layout from "../components/layout"
import SEO from "../components/seo"
import ProjectCard from '../components/projectCard'
import { useStaticQuery, graphql } from "gatsby"
const IndexPage = () => {
// this hook runs at build-time, querying for site data related to portfolio projects
const query = useStaticQuery(graphql`
query MyQuery {
allProjectsJson {
edges {
node {
id
title
description
github_url
demo_url
image {
childImageSharp {
fluid {
...GatsbyImageSharpFluid
}
}
}
}
}
}
}
`)
// this
const projects = query.allProjectsJson.edges;
return (
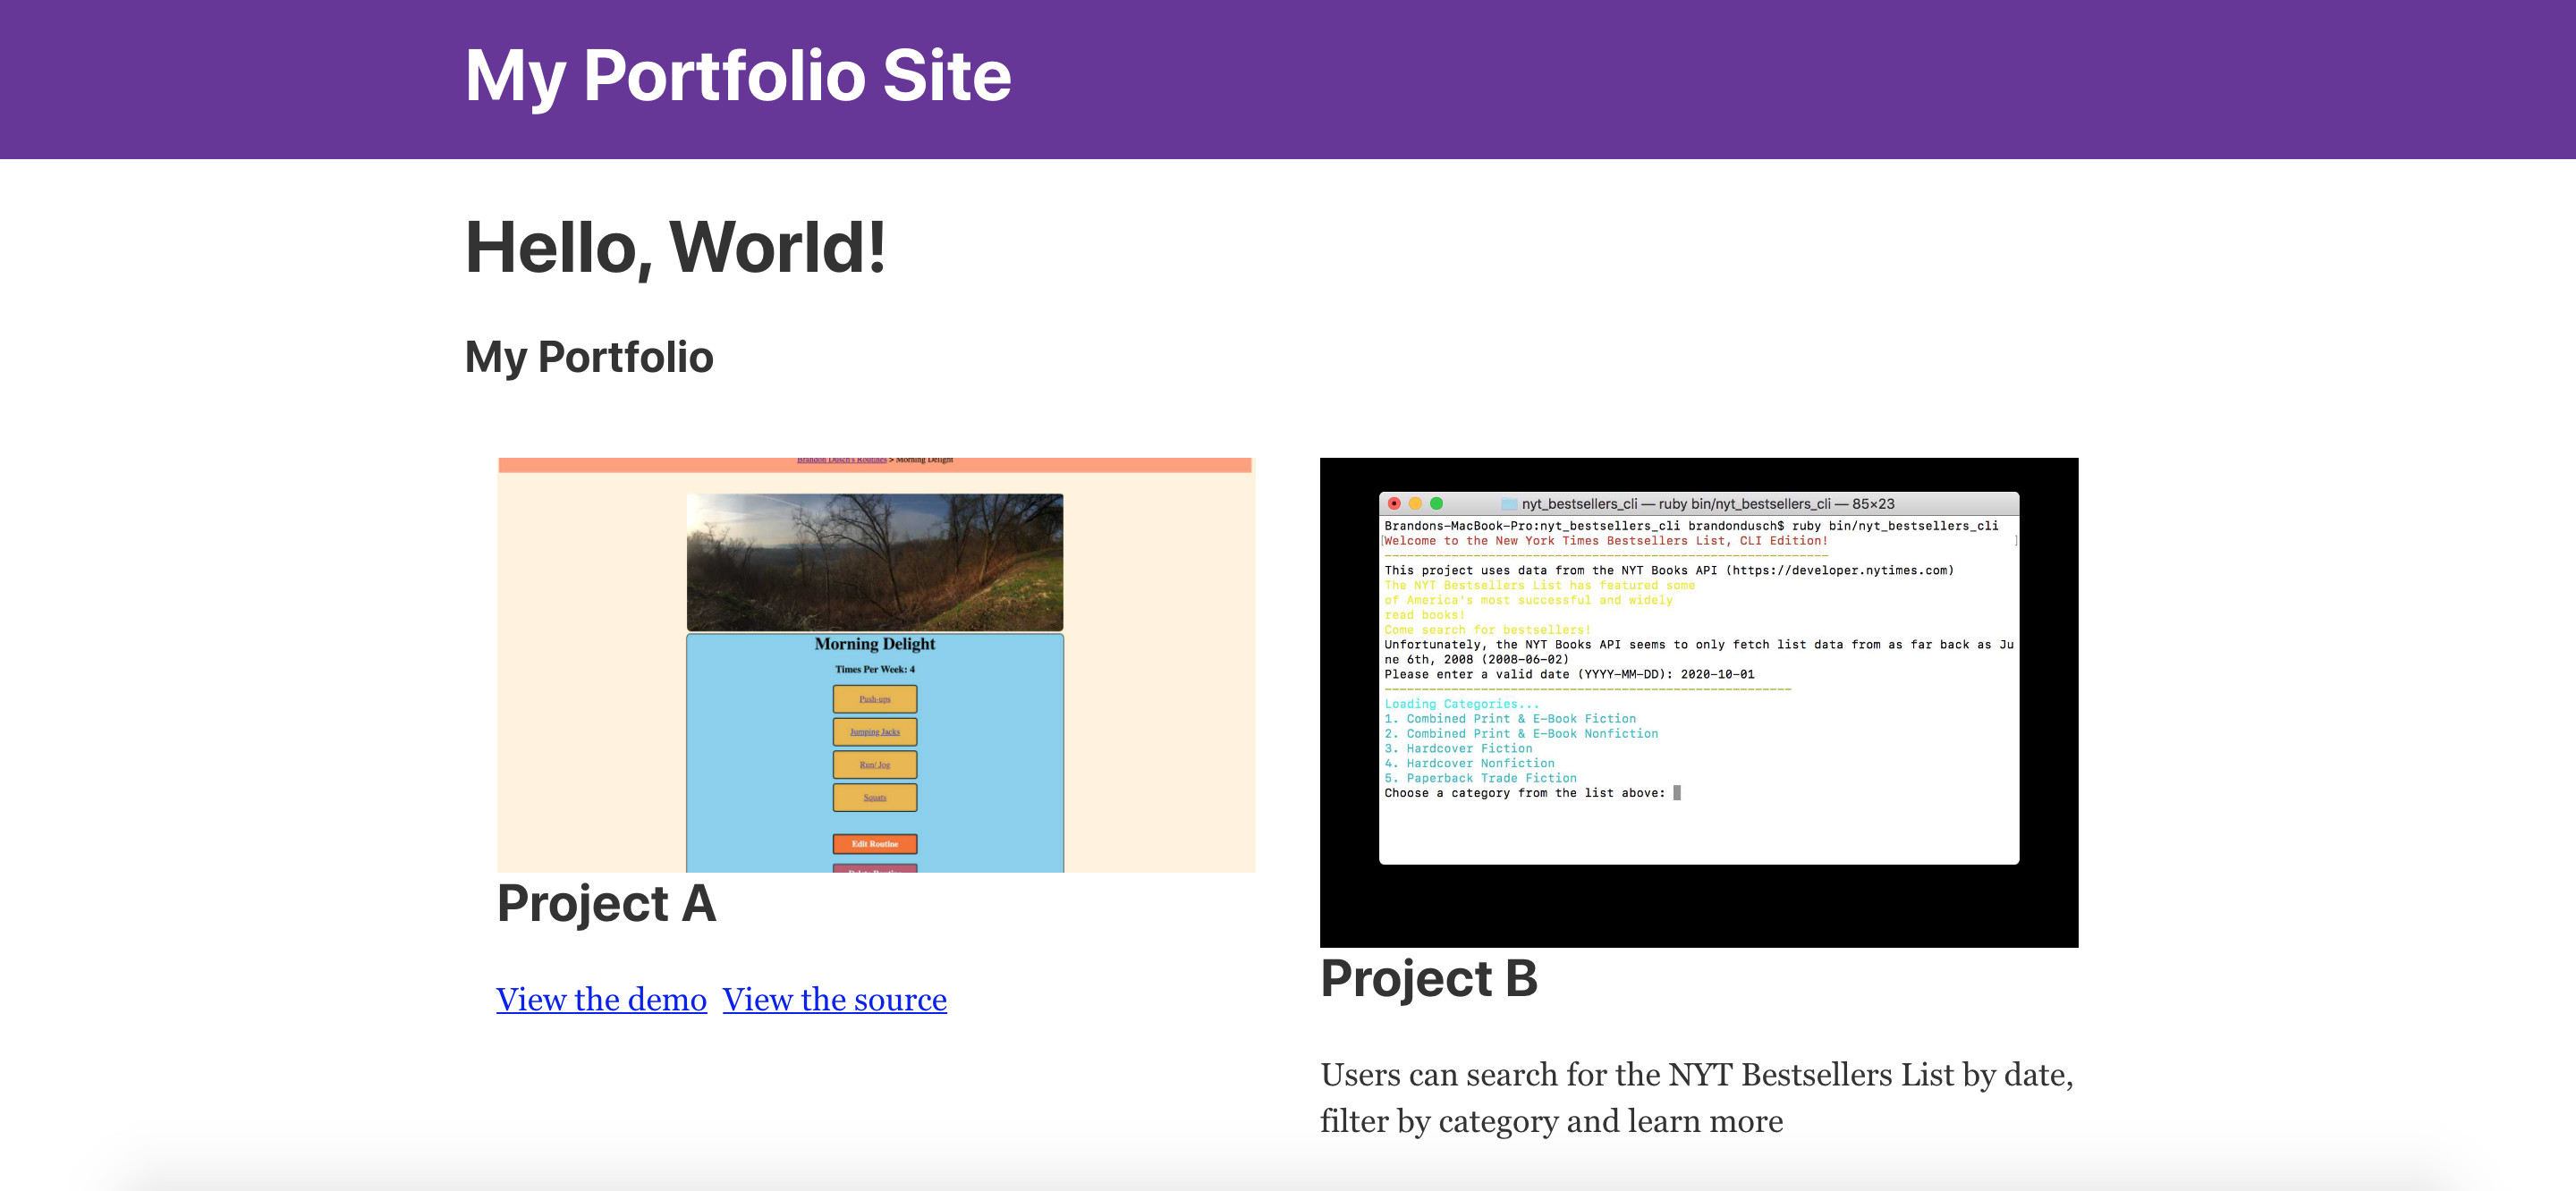
Hello, World!
My Portfolio
{/*We're gonna map over the array of projects by destructuring the nodes, aliased as "project"*/}
{projects.map(({node: project}) => {
const id = project.id
const title = project.title
const description = project.description
const demoURL = project.demo_url
const githubURL = project.github_url
const imageData = project.image.childImageSharp.fluid
return (
)
})}
)
}
export default IndexPage
```
And we now how our list of rendered project cards!
### Conclusion
While this may seem like an arduous tutorial, we actually cut down on a *lot* of coding by using GraphQL. We were able to render a variable amount of specially-queried data for site content. This time, we were only working with three projects. But if we had twice or thrice that many, or more, GraphQL and Gatsby are the ideal team. Gatsby may be meant for building static websites, but the amount of static data at hand makes GraphQL almost a necessity.
Happy Coding!
If you want to take a closer look, or report an issue or make a suggestion, check out the [repo on Github](https://github.com/Dusch4593/portfolio-site-blog-post) !
#### Resources
[ES6 in Depth: Destructuring](https://hacks.mozilla.org/2015/05/es6-in-depth-destructuring/)
[Graph Theory](https://en.wikipedia.org/wiki/Graph_theory)
[Why Gatsby Uses GraphQL](https://www.gatsbyjs.com/docs/why-gatsby-uses-graphql/)